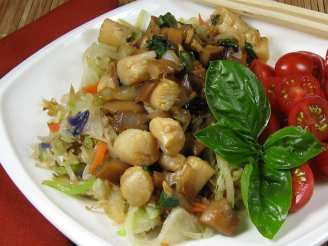
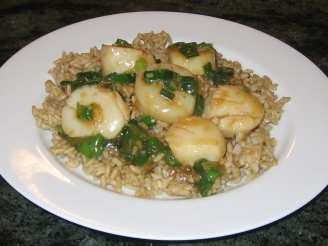
Vietnamese Stir-Fried Scallops

"A recipe from Ricardo"


- Ready In:
- 25mins
- Ingredients:
- 16
- Serves:
-
4
ingredients
-
Coconut sauce
- 1 cup coconut milk
- 1⁄4 cup lime juice
- 2 tablespoons fish sauce
- 2 tablespoons soy sauce
- 1 teaspoon sugar
- 1⁄2 teaspoon chili paste (to taste)
-
Stir-fry
- 6 ounces rice vermicelli
- 1 1⁄2 lbs medium scallops
- 1⁄4 cup peanut oil
- 4 green onions, white part only, thinly sliced on the diagonal (set aside green parts for garnish)
- 2 carrots, thinly julienned
- 1 garlic clove, chopped
- 1 tablespoon toasted sesame oil
- 1⁄2 cup roasted peanuts
- 1⁄4 cup cilantro
- salt
directions
- Coconut sauce: In a bowl, whisk together all the ingredients. Set aside.
- Stir-fry: In a large bowl, pour boiling water over the vermicelli and soak for about 5 minutes. Rinse with cold water and drain well. Set aside.
- Pat the scallops dry with paper towels.
- Heat half the peanut oil in a wok over high heat. Brown half the scallops, about 1 minute per side. Season with salt and set aside. Repeat with the remaining oil and scallops. Set aside.
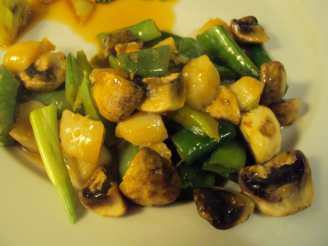
- In the same wok over medium-high heat, stir-fry the onions, carrots and garlic in the sesame oil, 3 to 4 minutes. Add the coconut sauce. Bring to a boil and reduce until the sauce thickens, 2 to 3 minutes. Add the scallops and cook just long enough to heat through.
- Serve on the vermicelli. Garnish with green onions, peanuts and cilantro.
Questions & Replies

Got a question?
Share it with the community!
Reviews
-
 We really enjoyed this for dinner tonight. I soaked the noodles a little too long, my fault. I also used some sliced sweet bell peppers in addition to a bit of the carrot (which I got tired of cutting up!), and less of the nam pla and soy sauce (I think I used about 1/3rd). Very flavorful, I only wish scallops were a bit more reasonable.
RECIPE SUBMITTED BY

<p><strong><span>I'm the host of Bargain Basement tag game in the cooking game forum. You're welcome to play anytime. You'll be surprised to find great recipes that were never reviewed. <br /></span></strong></p>
<p>~~~~~~~~~~~~~~~~~~~~~~~~~~</p>
<p><strong><span>I want to say a big thank you to everyone who tries my recipes and post photos. I don't always have the time to say thanks to each of you but be sure it's so appreciated :)</span></strong></p>
<p>~~~~~~~~~~~~~~~~~~~~~~~~~~</p>
<p> </p>
<p><img src=http://i195.photobucket.com/albums/z205/jubespage/zwt6%20banners%20and%20photos/captain.jpg alt=width=150 height=200 /></p>
<p><br /><img src=http://i27.photobucket.com/albums/c175/emmyduckie/zwt/ZwizzleBadge.jpg alt=width=200 height=300 /><br /> <br /><a title=banner3 href=http://www.flickr.com/photos/26630178@N05/3510953178></a><img src=http://farm4.static.flickr.com/3387/3510953178_b35b3086a8.jpg alt=banner3 width=500 height=250 /> <br /><img src=http://i23.photobucket.com/albums/b399/susied214/permanent%20collection/captain.jpg border=0 alt=Photobucket /> <br /><img src=http://i23.photobucket.com/albums/b399/susied214/permanent%20collection/PAC08Main.jpg border=0 alt=Photobucket /> <br /><img src=http://i23.photobucket.com/albums/b399/susied214/permanent%20collection/adoptedspring08.jpg border=0 alt=Photobucket /> By Brooke The Cook in WI <br /><img src=http://i147.photobucket.com/albums/r317/j_welcome/pics2/food/PRMRcopy.jpg alt=/ /> <br /><a href=http://www.recipezaar.com/bb/viewtopic.zsp?p=3510511#3510511> <br /> <br /><img src=http://i23.photobucket.com/albums/b399/susied214/projects/200_PACpic.jpg border=0 alt=Photo /> <br /> <br /></a><a title=Photo href=http://www.flickr.com/photos/boomette1/514183676></a><img src=http://farm1.static.flickr.com/252/514183676_f79b486466_m.jpg alt=good width=240 height=137 /> <br /><img src=http://i23.photobucket.com/albums/b399/susied214/permanent%20collection/Adopted1smp.jpg border=0 alt=Photo /> <br /><img src=http://i23.photobucket.com/albums/b399/susied214/permanent%20collection/smPACp.jpg border=0 alt=Photo /></p>
<p><img src=http://img.photobucket.com/albums/v726/annacia/Permanent%20Banners/ZTAA-sm.jpg border=0 alt=Photobucket /></p>
<p><img src=http://i21.photobucket.com/albums/b280/carolinamoon21/Ingredients/BANNERS/Pets-STKR.jpg alt=width=200 height=200 /></p>