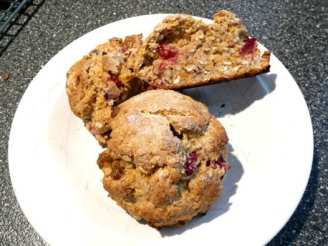
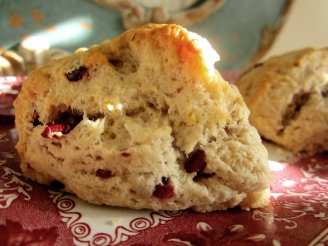
Cranberry Orange Scones

"I started with a basic scone recipe from "The Twelve Teas of Christmas" by Emilie Barnes (page 23), but this is far from it. I began tweaking the recipe according to my own preferences, after having other scones that were too sweet, not sweet enough, too dry, too soft, not flavorful enough, etc. This is where I've settled--for now! They're quite consistent, and consistently loved.
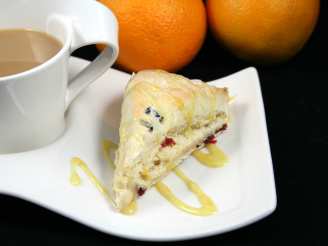
For a stronger orange flavor, you can add 1-2 tsp. orange extract and/or orange zest. You can also add a frosting or glaze made from orange juice and confectioner's sugar. Some extract, orange juice concentrate, and/or orange peel would add more flavor to that, too.
I tend to make a large amount because I make them for tea parties or for my large family, but you can easily halve the recipe. Serve with clotted cream (real or fake) and jam, but they're also great with butter, or plain. I make a clotted cream substitute by softening butter and cream cheese, then mixing them in a ratio of 1:1. Yum!"
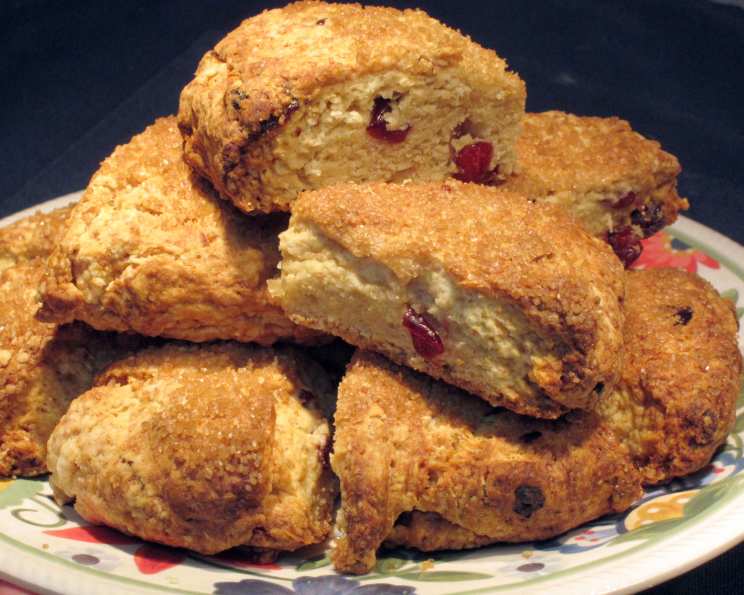

photo by TapestryThreads

- Ready In:
- 45mins
- Ingredients:
- 7
- Yields:
-
24 scones
- Serves:
- 24
ingredients
- 5 cups flour (white, whole wheat, or a combination)
- 5 teaspoons baking powder
- 3⁄4 cup sugar (white or demerara)
- 1 teaspoon salt
- 1 1⁄4 cups butter, softened to room temperature
- 1 cup orange juice
- 1 cup dried sweetened cranberries
directions
- Optional: Soak cranberries in the orange juice to plump them while you make the dough, for a few minutes, a few hours, or overnight before starting the recipe.
- Mix dry ingredients together, then cut in butter until mixture resembles coarse crumbs.
- Stir in orange juice and cranberries. Mix lightly until dough comes together. If it seems too dry, add more orange juice, but just one spoonful at a time. Texture should be like biscuit dough. Don't overmix.
- Dump the dough out on an oiled or floured surface. Oil or flour your hands, pat the dough together, then divide into four balls.
- Place each ball on an ungreased cookie sheet (or use a little cooking spray, just on the spots where you place the dough), then smooth and flatten each one to a 6-inch round about 1 inch thick.
- Sprinkle rounds with sugar if desired (it makes the tops sparkly--I use demerara sugar if I have it). Using an oiled knife, cut each round into 6 wedges.
- Bake at 425 degrees for about 20-25 minutes, or until lightly browned. Let cool on pan for a few minutes, then use a small serrated knife to separate the scones and transfer them to a rack or cloth-lined basket.
- You can also make drop scones by dropping spoonfuls of dough onto a cookie sheet. (I like to use an ice cream scoop--the kind that will push the dough out. It makes them round and consistently sized.) These don't bake so long (maybe 15 minutes), so watch them closely.
- I have normally made these in a heavy-duty mixer (Bosch), and when I had to make them by hand, it was much more challenging to avoid over-mixing while getting enough liquid incorporated. The finished texture was quite different. I had to bake them longer because they were doughy in the middle, and then they got too brown. So perhaps if you don't have a mixer, you should pat them thinner (maybe 3/4 inch) and add a little more baking powder to help the rise.
Questions & Replies

Got a question?
Share it with the community!
Reviews
-
 I made these today, and they are delicious. I added about 1/4 cup extra orange juice, and it turned out to be too much--the scones spread more than I wanted them to. I used a 2-inch biscuit cutter to make rounds, and I ended up with 19 scones that took about 18-20 minutes to bake. The texture and flavor are just perfect--unlike the dry ones you often get at coffee shops. Post some more recipes, TapestryThreads!
RECIPE SUBMITTED BY

<p>I've been baking since I was six years old...but I rarely go beyond the basics. I love recipes that are easy, predictable, and delicious! When I'm tired or a bit down, baking relaxes me and cheers me up. Since I'm maintaining a substantial weight loss (or trying to, anyway!), I can't put too many temptations before myself, so I try to do it when there are people around to enjoy the results. I love baking people happy!</p>