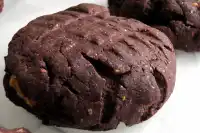
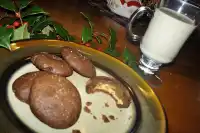
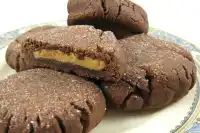
Magic Peanut Butter Middles Cookies

"This recipe was in a magazine clipping years ago. I haven't tried these cookies but they sound good."
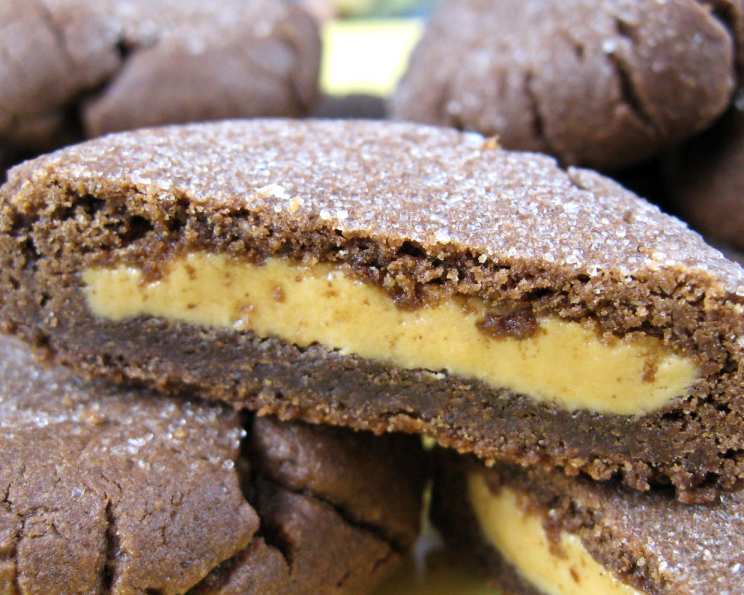
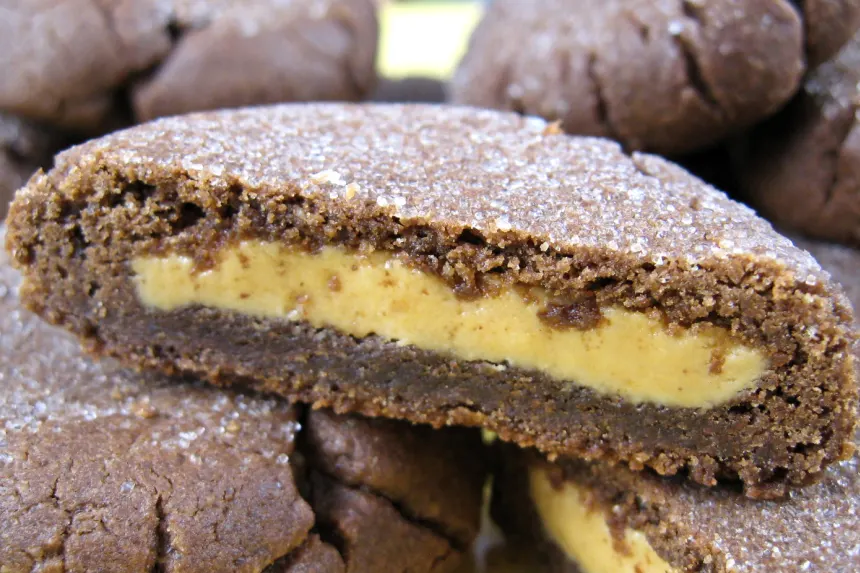
photo by Kathy


- Ready In:
- 54mins
- Ingredients:
- 11
- Yields:
-
30 cookies
- Serves:
- 30
ingredients
- 354.88 ml flour
- 118.29 ml unsweetened cocoa
- 2.46 ml baking soda
- 118.29 ml sugar
- 118.29 ml brown sugar, packed
- 118.29 ml butter or 118.29 ml margarine
- 59.14 ml peanut butter
- 4.92 ml vanilla
- 1 egg
-
Filling
- 177.44 ml peanut butter
- 177.44 ml powdered sugar
directions
- In a small bowl, combine flour, cocoa, and baking soda.
- In a large bowl, beat sugar, brown sugar, and butter until well blended.
- Blend in 1/4 cup peanut butter to mixture. Add vanilla and egg, beat well.
- Add flour mixture until blended. Set aside.
- In a small bowl, combine filling ingredients, blending well.
- Roll filling into 30 one inch balls.
- For each cookie, with floured hands shape 1 tbs dough around 1 peanut butter ball, covering completely.
- Place cookies 2 inches apart on an ungreased cookie sheet.
- Flatten with the bottom of a glass dipped in sugar.
- Bake at 375 degrees for 7 to 9 minutes or until set and slightly cracked.
- Cool on wire racks.
Questions & Replies

-
 Can you freeze Magic Peanut Butter Middles cookies after they are baked so they stay soft?
Reviews
-
WOW!!!!The chocolate outside is great tasting but as soon as you hit the peanut butter layer, its pure heaven. My new favorite cookies by far.
-
 UPDATE: Made these cookies a second time, and I'm upping my review from 4 stars to 5 stars. MARCH 13, 2011: A really good cookie! They look like plain chocolate cookies until you break one open. I first found this recipe on MyRecipes.com and it was called Magic in the Middles. A nice but slightly vague name, and I like your version better -- it's more indicative of what's in the cookie. I used creamy peanut butter, unsalted butter, and 1/4 tsp. salt in the dough. Also, to compensate for high altitude (6500 feet), I added an extra spoonful of flour. After forming the balls, rather than dipping a glass in sugar and flattening the cookie, it's much easier to take the ball of dough and dip the top in sugar, then flatten slightly (flatten to 1/2 inch high) with a glass. I was a bit worried about making sure there were no cracks in the cookies before they went into the oven -- wasn't sure if the filling would leak out. That was not an issue, and a few tiny cracks are okay. I baked my cookies 7 minutes and that was plenty of time. Definitely worth the time spend rolling the peanut butter centers and covering them with dough.
 -
 I saw this recipe on a Food.com Facebook post as a Christmas cookie suggestion and decided to give it a shot and I'm glad I did! I doubled the recipe and wound up getting 72 cookies out of it. I also had a little bit of difficultly figuring out how to get the dough to wrap around the peanut butter balls. I wound up putting the peanut butter balls in the freezer to firm them up and I added a splash of milk to the outside batter since it seemed a little crumbly and it worked like a charm! I also had trouble finding a jar that had nothing on the bottom so I didn't have imprints so I wound up using one of our drinking glasses. I agree with *Kathy* in saying that it's much easier to dip them in sugar and then press them out so the sugar stays on the cookie. I baked them for 10 minutes per tray and they came out perfect. I personally wouldn't change a thing on the ingredients because they sweet inside seems to balance well with the outside. Thank you for posting! This will definitely be added to the yearly Christmas cookie list.
 -
 Good cookie! If you like to bake, they do take a bit of work. Delicous, and definately on the Christmas cookie list.<br/>Make sure the peanut butter balls are 1"or just under. And break the 1tblsp of cookie in 1/2 to "wrap" around the PB.
 -
We've been looking for something like this!!! They taste great, and everyone loves the surprise inside. I used Ener-G egg replacement powder mixed with water instead of the egg, due to family food allergies. I suggest dividing both the dough and filling into the same number of parts before starting assembly (a pastry mat works great!).
see 8 more reviews
RECIPE SUBMITTED BY

beckas
Bay Area, CA
I love Recipezaar! I have found many great recipes on this site! Since I've found zaar, I've been spending more time making recipes from zaar than I have from my dozens of cookbooks. What can I say....zaar members post darn good recipes! I wish that I could spend more time cooking but I tend to keep meals simple because I work full time as an Microsoft Exchange E-mail Administrator and I spend the rest of my time taking care of my three year old toddler. He demands so much of my time that I don't have as much time to cook as I used to. My favorite hobbies are collecting recipes and photography. I am an amateur photographer and I take pictures at almost every chance that I get. The picture that is posted on this page is a self portrait.