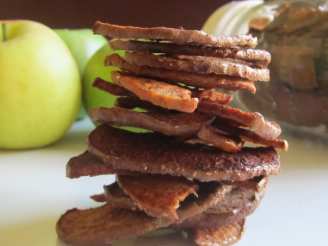
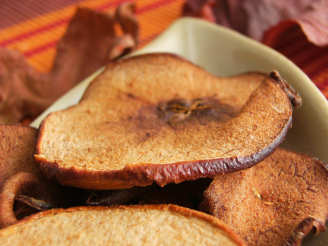
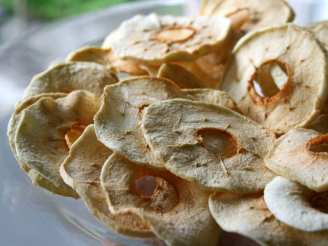
Apple Chips

"From Ricardo. Sure looks tasty!"

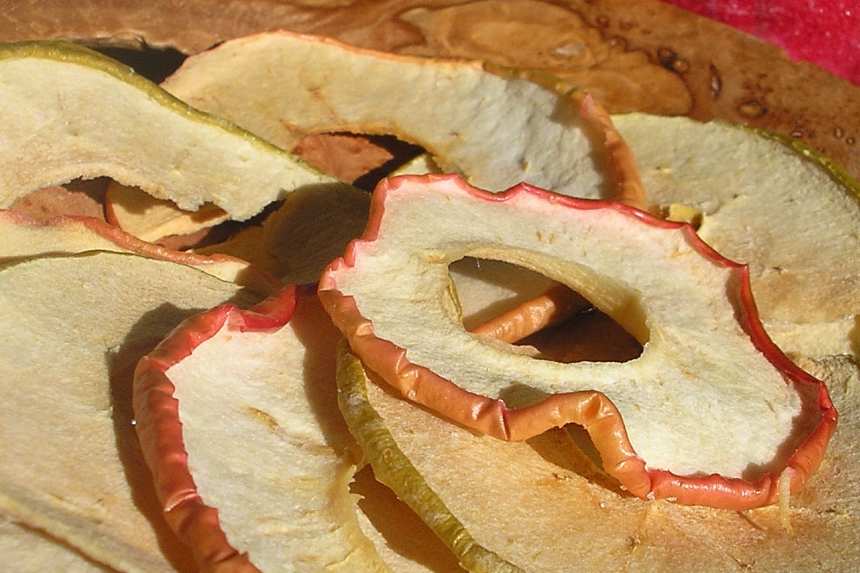
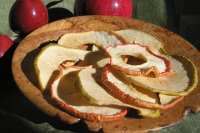
photo by Shannon 24


- Ready In:
- 4hrs 10mins
- Ingredients:
- 6
- Serves:
-
2
ingredients
- 1⁄4 cup lime juice
- 1⁄4 cup water
- 1 tablespoon sugar
- 1 granny smith apple
- 1 paula red apple
- fleur de sel
directions
- With the rack in the middle position, preheat the oven to 75°C (170°F). Line two baking sheets with parchment paper and oil lightly.
- In a bowl, dissolve the sugar in the lime juice and water. Set aside.
- Using a mandoline, slice the apples into rounds 2 to 3 mm (1/16 inch) thick. Place the slices in the lime juice mixture.
- Drain, then arrange the apple slices on the baking sheets so they don’t touch. Sprinkle with fleur de sel and, optionally, curry powder.
- Bake until the apples are dried, about 4 hours. Let cool and carefully peel them off the parchment.
- Store in an airtight container.
- *Note: In humid weather, these chips will soften quickly. Return them to the oven as required.
Questions & Replies
Got a question?
Share it with the community!
Reviews
-
 I used my el cheapo plastic Farberware mandolin slicer, which seems to only have 1 thickness: ultra-thin (like prosciutto). I used a large Pink Lady apple and followed the 4 hour @ 170F as best I could (my oven starts at Warm, then goes to 200F on the dial). I also used ZSweet instead of sugar (it's Erythritol based, so is natural), and dusted the slices with cinnamon before baking.<br/><br/>They turned out great! They weren't brown at all (except from the cinnamon) thanks to the lime juice (but Pink Lady apples already resist browning naturally due to a high acid content) and I loved the crunch. I think I will try to figure out how to use this food processor I received from an estate sale a few years back so that I can make them a little thicker... and of course much more quickly.<br/><br/>My next kitchen gadget needs to be a multi-tiered sheet pan so I can make several apples at a time into these yummy and healthy chips.
 -
 Although all of my chips burnt I am still going to give this 5 stars. I cut them into 3mm slices and followed Charolette J's advice and baked them for 2 1/2 hrs at 225. I'm not sure if my oven temp is off or what cause I checked them 1hr and 15 min. into it and they were already burnt. There were two slices that turned out fine and they were WONDERFUL! Next time I will follow the original recipe and bake for 4hrs @ 170!
 -
 These are exceptional tasting and just like the ones you buy. Of course convenience of making/baking at home is the definite + here. You can bet this chicky isn't going to buying out priced chips any longer. Thanks Celine~ A definitely keeper! Made for 123 Hit Wonders 08~
 -
 These were delicious, easy and fun to make. I waited to core the apple after I had sliced them on my mandoline. I placed them on my Cook-eze baking liners instead of parchment paper. 4 hours are up and the ones that I sliced very thin were done. But the ones that were thicker needed to go back in, I put the temp up to 225 degrees for them. I really don't think I'll need to worry about humidity as they will not last long enough. Thanks for a tasty, healthy way to have dried apples other then buying those gross ones at the store. I will make these again. *Update* on 225 degrees: this worked really well. So next time I made these I'll bake them at 225 and check them after 2 1/2 hours. Made for *1 2 3 Hit Wonders* game 2007
 -
I have made these but will come back and award stars when I have cooked with them - over Christmas and the New year! They were so easy to make and I can see endless possibilities of using them. I dried mine in the bottom drawer of my Godin woodburning cooker - over night after I had put the last log on before Bed! it worked like a dream. Great recipe thanks Reds - I will be back with stars and photos...I have plans for them! FT:-)
see 1 more reviews
RECIPE SUBMITTED BY

Canadian girl that loves to cook for herself and for everyone around her!! I always enjoyed cooking but more so since I started taking better care of myself by eating healthier food (I am a Weight Watchers Lifetime member!). I still love my chocolate though!
<img src="http://www.recipezaar.com/members/home/1956/samethingsticker.jpg">
<img src="http://i23.photobucket.com/albums/b399/susied214/permanent%20collection/PAC08Main.jpg" border="0" alt="Photobucket">
<img src="http://i23.photobucket.com/albums/b399/susied214/permanent%20collection/adoptedspring08.jpg" border="0" alt="Photobucket">
<img src="http://www.recipezaar.com/members/home/1956/SoupsandsaladSTICKER.jpg">
<img src="http://i21.photobucket.com/albums/b280/carolinamoon21/Ingredients/PastastickerJPEG.jpg">
<img src="http://img.photobucket.com/albums/v204/derf16/food%20photography%20series/MuffinLovesticker.jpg">
<img src="http://i21.photobucket.com/albums/b280/carolinamoon21/Ingredients/Other/photo-swap-7sticky.jpg">
<img src="http://www.recipezaar.com/members/home/1956/L%5B1%5D.F-stickJPEG.jpg">
<img src="http://i273.photobucket.com/albums/jj240/marienixon_715/kittencaljpg.jpg">
<img src="http://img.villagephotos.com/p/2003-11/484938/Spelling-Bee-stick2jpg.jpg">
<img src="http://i21.photobucket.com/albums/b280/carolinamoon21/Octoberevent.jpg">
<img src="http://i23.photobucket.com/albums/b399/susied214/projects/200_PACpic.jpg" border="0" alt="Photo Sharing and Video Hosting at Photobucket">
<img src="http://i23.photobucket.com/albums/b399/susied214/projects/pacbanner.jpg" border="0" alt="Photo Sharing and Video Hosting at Photobucket">
<img src="http://i23.photobucket.com/albums/b399/susied214/permanent%20collection/untitled.jpg" border="0" alt="Photobucket - Video and Image Hosting">
<img src="http://i23.photobucket.com/albums/b399/susied214/permanent%20collection/200_artistrichardneuman-art-prints_.jpg" border="0" alt="Photobucket - Video and Image Hosting">
<img src="http://i21.photobucket.com/albums/b280/carolinamoon21/TasteofYellow.jpg">
<img src="http://www.recipezaar.com/members/home/1535/CLC1.gif">
<img src="http://i21.photobucket.com/albums/b280/carolinamoon21/Derfcookathon.jpg">