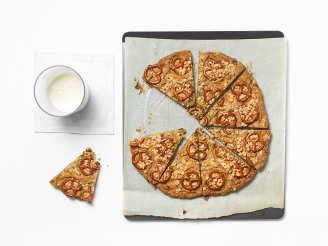
Mr. Food Chocolate Chip Cookie Pizza

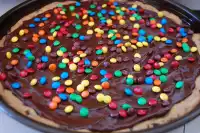
"I finally found this recipe after looking for it for years! I used to make this for my boys on their birthdays but switched to cinnamon rolls after I misplaced the recipe. I top it with re-whipped store bought frosting and mini m&m's. Printed in the winter 1998 issue of Mr. Food's Easycooking and posted here so I won't lose it again!"

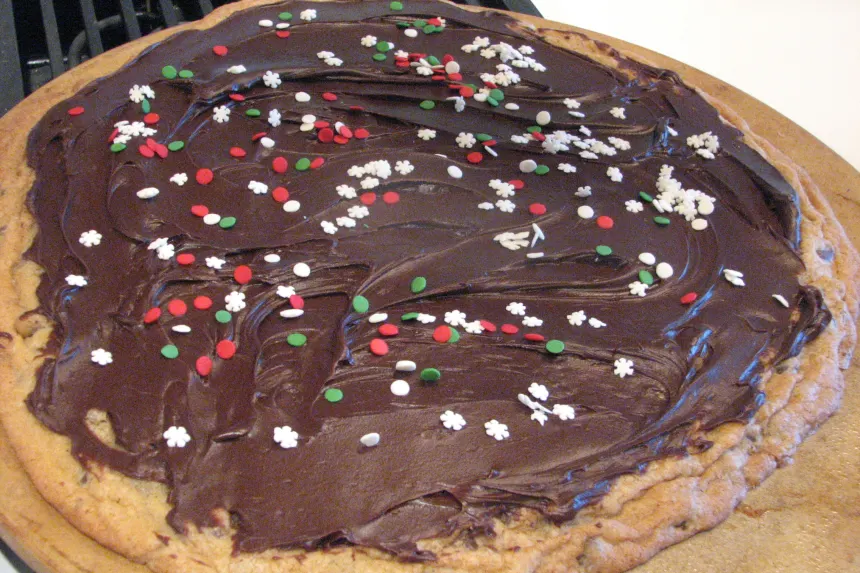
photo by Bonnie G #2


- Ready In:
- 30mins
- Ingredients:
- 13
- Serves:
-
16
ingredients
- 1⁄2 cup brown sugar, light and packed
- 1⁄4 cup granulated sugar
- 1⁄2 cup butter, softened
- 1 egg
- 1 teaspoon vanilla extract
- 1 1⁄4 cups flour
- 1⁄2 teaspoon baking soda
- 6 ounces semi-sweet chocolate chips (I use milk chocolate)
- 16 ounces frosting
-
Optional
- 1⁄4 cup walnuts, chopped
- 1⁄4 cup coconut, flaked and toasted
- 1⁄4 cup chocolate candy
- candy sprinkles
directions
- Preheat oven to 350 degrees.
- In a large bowl, beat together brown & white sugars, butter, egg and vanilla until creamy.
- Add flour and baking soda, mixing well. The dough will be stiff.
- Stir in chocolate chips.
- Spread evenly on a 12 inch pizza pan.
- Bake 12-15 minutes or until golden brown. (I made this yesterday and mine took 20 minutes in a deep dish pan). It looked a bit undercooked, but after cooling, it made a nice chewy cookie.
- Cool completely.
- Spread frosting over top of cookie, leaving a 1/4 inch border around the edges.
- Sprinkle with optional ingredients if desired.
- Cut into 16 wedges.
Questions & Replies

Got a question?
Share it with the community!
Reviews
-
 I made this today as a trial run for my daughter's upcoming 9th birthday party. It worked great. We have a milk and soy allergy so I made it with Tenderflake shortening instead of butter. I baked it on convection at 335 degrees for 12 minutes and it was a perfect consistency with a golden color. We plan to ice the actual birthday one with white frosting and let the kids decorate their piece with gummy bears and jelly beans themselves. The party is at a glow in the dark mini put so the white icing will really shine and the cookie will be a great base for the toppings Thanks for the recipe.
 -
 After seeing your picture I had to try this so finally made it for DGS's b-day. I made it exactly as directed, baked for 15 minutes and used your ideal for the rewipped frosting and topped with large sprinkles. It went together so easy and looks so impressive I love it. The taste was as good as it looked, nice and chewy on the inside. The only think I think I'll do next time is bake it on parchment paper so I'll be able to easily move it to a nicer serving try after it's finished. Thanks so much for posting this fun and yummy recipe.
 -
 My son asked for a chocolate chip cookie pizza for his 19th birthday cake. This turned out very good. I followed the directions. The cookie pizza was done in 12 minutes. I recommend this recipe.
RECIPE SUBMITTED BY

<img src="http://www.recipezaar.com/members/home/1956/ShootnowSTKR.jpg">
<img src="http://i23.photobucket.com/albums/b399/susied214/permanent%20collection/smPACp.jpg" border="0" alt="Photo Sharing and Video Hosting at Photobucket">
<img src="http://i10.photobucket.com/albums/a132/tgifford/participation%20banners/coolmonday-particiation.jpg" border="0" alt="Cookathon for Cool Monday (1)">
<img src="http://i23.photobucket.com/albums/b399/susied214/permanent%20collection/IWasAdoptedfall08.jpg" border="0" alt="Photobucket">
<img src="http://i23.photobucket.com/albums/b399/susied214/permanent%20collection/PACfall08partic.jpg" border="0" alt="Photobucket">
<img src="http://i250.photobucket.com/albums/gg271/MrsTeny/AMpageSticker.jpg" border="0" alt="Photobucket">
<img src="http://i250.photobucket.com/albums/gg271/MrsTeny/CookathonforKarensticker.jpg">
<img src="http://i10.photobucket.com/albums/a132/tgifford/Game%20Room%20Banners/AM%20Banners/KBparticipation.jpg" border="0" alt="Photobucket"><img src="http://i250.photobucket.com/albums/gg271/MrsTeny/Permanent%20Collection/PACSpring09Participation.jpg">
<img src="http://i250.photobucket.com/albums/gg271/MrsTeny/Permanent%20Collection/PACSpring09Iwasadopted.jpg">
<img src="http://i80.photobucket.com/albums/j166/ZaarNicksMom/PACsticker-Adopted.jpg"><img src="http://i80.photobucket.com/albums/j166/ZaarNicksMom/Animation6.gif"><img src="http://i16.photobucket.com/albums/b2/kiwidutch/my3chefs2009final-1.jpg">