Coffee Cookie Buns, Aka Mexican Coffee Buns, Rotiboy (Copycat)

"Prep time includes resting/rising.
Also a copycat of Pappa Roti.
These are delicious and so different- Not really Mexican, they are from Malaysia. It is like a thin coffee butter cookie spread over the bun. When you bite into these the outside is crisp while the inside is soft and buttery.
I have been told you can freeze the cooked buns and heat in an oven for 10-12 min.(never tried this)--the texture does end up being more chewy/dense after the first day (still tastes good)--so I halve the recipe if I know they won't get eaten by the next morning. Or refrigerate half the dough to use the next day.
The outer crust will go soft after a while--if the buns are room temperature, heat in oven for about 4-5 minutes and then take out and wait a minute or two and it crisps up again.
You may need extra bread flour in the final dough when kneading if too sticky...add a TBS at a time. This recipe is converted from metric to US measurements so it is not always easy to get exact."
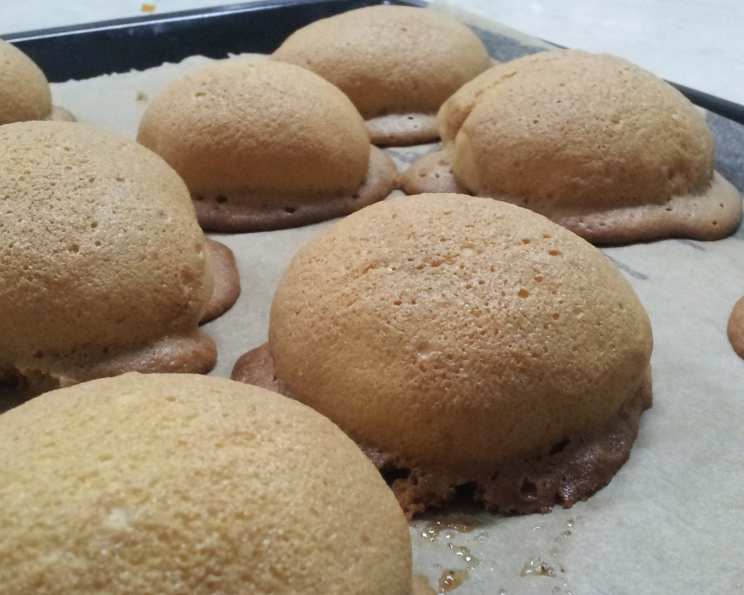
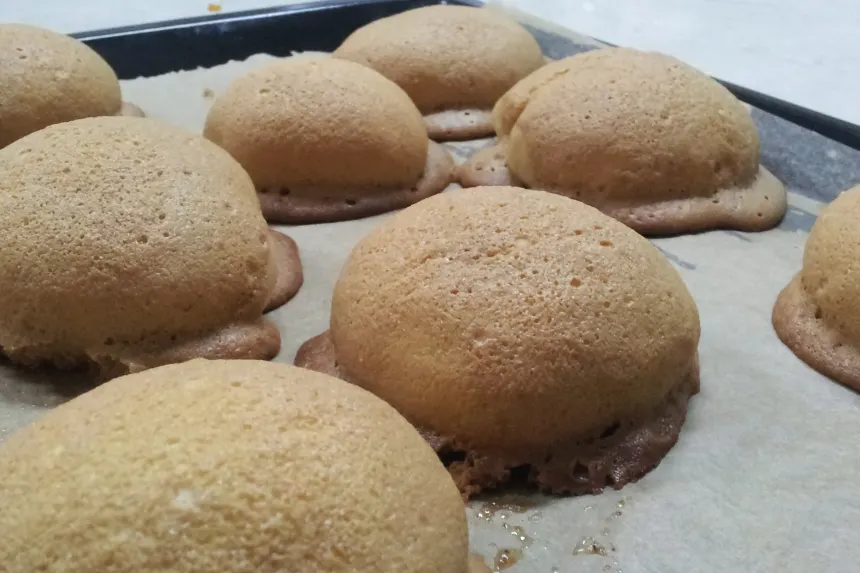
photo by ' =^..^= 'Ameera' =^..^= '


- Ready In:
- 4hrs 3mins
- Ingredients:
- 23
- Yields:
-
22 buns
- Serves:
- 22
ingredients
-
Pre-dough ingredients
- 1⁄2 cup water
- 1⁄2 cup bread flour
-
For the sponge dough
- 2 1⁄2 cups bread flour
- 2 1⁄4 teaspoons instant yeast
- 2 teaspoons caster sugar
- 3⁄4 - 1 cup warm water
-
For the final dough
- 1⁄2 cup caster sugar
- 1 teaspoon salt
- 4 tablespoons unsalted butter (room temp)
- 1⁄2 teaspoon vital wheat gluten
- 1 1⁄2 eggs
- 2 crushed ice cubes
- 1 3⁄4 cups bread flour
- 1 tablespoon liquid honey
- 4 tablespoons powdered milk or 4 tablespoons dry buttermilk
-
For the filling
- 3⁄4 cup salted butter, cut into 22 pieces (that is a stick and a half of butter, place the cut pieces in freezer for 30-45 min. to firm)
-
For the topping
- 6 tablespoons unsalted butter (room temp)
- 1 cup minus 2 tbs icing sugar
- 4 teaspoons instant coffee
- 1 tablespoon hot water
- 1 1⁄2 eggs
- 2⁄3 cup all-purpose flour
- 2 tablespoons powdered milk
directions
-
Pre-dough:
- Heat Water on stove over high heat until hot (does not have to be boiling, just close to it).
- Turn heat down to low and add flour and stir till well combined.
- Place in bowl, covered with plastic wrap and leave in refrigerator for at least 2 hours.
-
Sponge:
- Add all ingredients in a large mixing bowl and knead for 6 minutes. The dough should be a very soft dough--it is ok if it is sticky.
- Shape into a ball, and cover bowl with plastic wrap or damp kitchen towel and leave to rest in a warm place for 90 minutes to rise.
-
Final dough:
- Combine the pre-dough mixture to the sponge dough and knead for 30 seconds.
- Add the caster sugar, salt, milk powder, and vital wheat gluten and knead another 30 seconds.
- Add the eggs, honey, and crushed ice and knead for a minute.
- Add the bread flour and knead for a minute.
- Add the butter and knead for about 10 minutes until elastic--you may need to add bread flour if its too sticky. Add a TBS at a time. I once needed none extra, but another time I actually had to add about 1/4 cup more bread flour.
- Its ok if it is slightly sticky. I learned one trick to kneading dough when it is still a bit sticky -- knead for about 30 seconds, then pick up the ball of dough and throw it down hard in the mixing bowl or on the counter you are kneading on. Pick it up and throw it down hard again like this 3-4 times. Then knead for a 30seconds to a minute and do the picking up and throwing down process again. After 4-5 times the dough does end up being less sticky.
- Shape into a ball, place back into the mixing blowl and cover with plastic wrap or damp towel and let it rest for 10 minutes.
- Grease your hands with some butter or oil, and divide the dough into 22 pieces.
- Now it is time for the salted butter filling.
- Shape a piece into a ball, flatten a bit, and add a piece of butter.
- Pinch the dough over the butter and roll back into a ball.
- Flatten to 1/2 inch and place on baking sheet lined with parchment paper (place the side that you pinch up over the butter facing down because that side might cave in if left face up)--keep each bun about 2-3 inches apart.
- Cover with damp kitchen towel and leave to rest/rise for 45-50 minutes.
- about 15 minutes before it is done resting/rising, pre-heat your oven to 350°F.
-
While resting/rising, prepare the topping:
- Dissolve the instand coffee with the hot water.
- With an electric mixer on low, beat the butter, icing sugar and coffee for 30 seconds to a minute till mixed and smooth.
- Add the eggs and beat for another 30 seconds.
- Add the flour and milk powder slowly and beat on low for 30 seconds and then on high for another minute or so until mixed well.
- Take a piping bag fitted with a round or star shaped nozzle (if using a disposable piping bag, you don't have to use a nozzle -- just cut a small hole with scissors) and fill with the filling mixture.
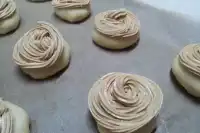
- Pipe the filling on top of each bun in a twirly circular pattern. (I will post photos so you can see what I mean).
- Do not use a plastic zippy bag as a piping bag -- I tried this the first time I made these and the bag burst while piping. I tried another zippy bag again and it burst again. So I spread the topping as best I could with a spoon and then went out and bought a piping bag the next time I made these.
- You can also find tutorials online how to make a piping bag with parchment paper if you do a search for it.
- Bake for around 18 min, or until lightly golden brown.
- Take out and place on cooling rack -- but you only need to let them rest there for a minute or two -- the topping will still be slightly soft, but will get more crisp as it sits outside the oven.
- Eat while still hot/warm! yumm yumm.
Questions & Replies

Got a question?
Share it with the community!
Reviews
-
 I finally made these today, and they turned out awesome! Even though I did not have any VWG or Bread Flour (and I can only imagine the taste if I had those ingredients!). Great stuff!
 -
 This recipe worked very well for me! Changes I made: -- Used an electric mixer with a dough hook for nearly all of the dough kneading described -- Completely omitted the VGM -- Used powdered/icing sugar in place of the caster sugar. -- I spent more time kneading the final dough than was described. Initially the dough was not elastic enough, I ran the mixer until the dough was able to thinly stretch without tearing. Changes I would make next time: -- Maybe use a salted butter with higher salt content for the pieces wrapped into the buns, and then get away with adding less per bun. ~1/2 Tbsp per bun ends up being kind of a lot -- When baking, flip the buns up to check the bottom to see if they're done. With the icing covering the top of the bun it's hard to tell otherwise. -- Maybe use the recipe to make 24 buns instead of 22. 22 is harder to make evenly sized, at least for me. For the commenter who tried to half the measurements I'm not sure what would have gone wrong for them exactly, but a half batch of this would not have been enough to engage the dough hook on my medium-sized kitchenaid mixer.
 -
 I tried it today. I did half the measurements and it failed, miserably. I honestly don't know what went wrong.
 -
 i never write reviews to ANY THING not hotels to recipes nothing at all . but the recipe was way more than i expected its and exact copy of the world famous papparoti buns . i had to register just to post a review but really great job on this recipe i love it it amazing didn't change a thing perfect as it is