Roasted Garlic Bread

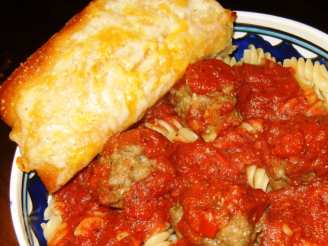
"This has a great roasted flavour and tastes even better when dipped into some tomato sauce. I got this from Taste of Home."
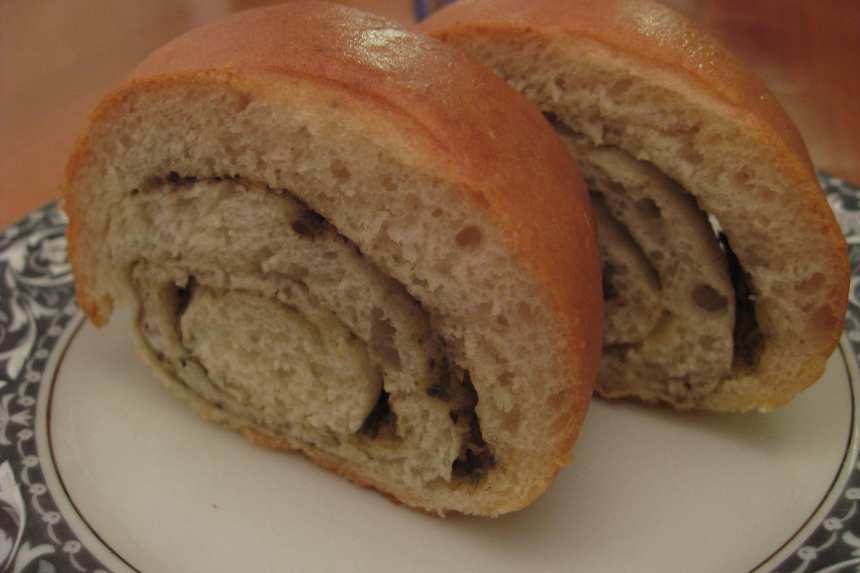
photo by Scarlett516

- Ready In:
- 2hrs 50mins
- Ingredients:
- 12
- Yields:
-
2 loaves
- Serves:
- 20
ingredients
- 2 medium heads of garlic
- 2 teaspoons olive oil
- 1 (1/4 ounce) package active dry yeast
- 1 cup warm water (110 F-115 F)
- 1 tablespoon sugar
- 1 teaspoon salt
- 2 1⁄2 - 3 cups all-purpose flour
- 2 tablespoons minced fresh sage or 2 teaspoons rubbed sage
- 2 teaspoons minced fresh marjoram or 3/4 teaspoon dried marjoram
- 1 teaspoon minced fresh rosemary or 1/2 teaspoon dried rosemary, crushed
- 2 tablespoons grated parmesan cheese
- 1 tablespoon butter, melted
directions
- Remove papery outer skin from garlic (do not peel or separate cloves). Cut top off garlic bulbs; brush with oil. Wrap each bulb in heavy-duty foil. Bake at 425°F for 30-35 minutes or until softened. Cool for 10-15 minutes. Squeeze softened garlic into a small bowl; set aside.
- In a large mixing bowl, dissolve yeast in warm water. Add the sugar, salt, and 1 cup flour; beat until smooth. Stir in enough remaining flour to form a soft dough.
- Turn onto a lightly floured surface; knead until smooth and elastic, about 6-8 minutes. Place in a bowl coated with nonstick cooking spray, turning once to coat top. Cover and let the dough rise in a warm place until doubled, about 45 minutes. Meanwhile, add the sage, marjoram, and rosemary to the reserved roasted garlic. Mash with the back of a spoon to form a paste.
- Punch dough down. Turn into a lightly floured surface; divide in half. Roll each portion into a 10" x 8" rectangle. Spread each with half the garlic mixture to within 1/2" of edges. Sprinkle each with 1 tablespoon Parmesan cheese. roll up jelly-roll style, starting with a long side; pinch seam and ends to seal.
- Coat a baking sheet with nonstick cooking spray. Place loaves seam side down on pan; tuck ends under. With a sharp knife, make several slashes across the top of each loaf. cover and let rise until doubled, about 30 minutes.
- Bake at 375°F for 20-25 minutes or until golden brown. Remove to wire racks; brush with butter.
Questions & Replies

Got a question?
Share it with the community!
Reviews
-
 I don't always have the patience for baking yeast breads, but THIS WAS A PLEASURE to make [not to mention the ENJOYMENT of eating]! Followed the recipe & this time around used fresh herbs! Thanks much for sharing this recipe for a very tasty bread! [Tagged, made & reviewed for one of my invitees to the Aus/NZ Recipe Swap #14, Mar 08]
RECIPE SUBMITTED BY

I joined Recipezaar to learn new recipes that are home cooked. I grew up having ready-meals like Encor and Stouffers and needed recipes that don't simply require opening a box and plopping in the oven! I enjoy cooking when I have the time to try new dishes. I make every recipe as written if I'm reviewing it to give a true review. If I make alterations that aren't in the directions, I don't feel it's a true reflection of the recipe; it's another recipe to me.
<img src="http://i23.photobucket.com/albums/b399/susied214/permanent%20collection/participantbannerzwt5.jpg" border="0" alt="Photobucket">
<img src="http://i23.photobucket.com/albums/b367/chefpaulag/final-1.jpg">
<img src="http://i23.photobucket.com/albums/b399/susied214/permanent%20collection/captain.jpg" border="0" alt="Photobucket">
<img src="http://www.recipezaar.com/members/home/329769/ninja%20bmp.jpg" width=75%>
(Zaar World Tour 4)
<img src="http://i23.photobucket.com/albums/b399/susied214/permanent%20collection/adoptedspring08.jpg">
<a href="http://s7.photobucket.com/albums/y254/Missymop/?action=view¤t=cunningcrocodiles.jpg" target="_blank"><img src="http://i7.photobucket.com/albums/y254/Missymop/cunningcrocodiles.jpg" border="0" alt="Photobucket"></a>
<img src="http://i26.photobucket.com/albums/c105/jewelies/DSC_0020.jpg">
(Australia/New Zealand Swap #15)