Serviette/Napkin, Basket

"Between the teachings of my Grandmother, an Aunt, my Mother and several restaurants I learned a lot about serviette/ napkin folding.. Now that I have already posted all the napkin folds I know, I decided to look on the net for some new ones to learn. This one is a delightful little basket and I have tried hard to explain and photograph the steps as much as possible because some of the steps *seem* tricky. It takes very LITTLE perseverance to get the hang of this however, so please don't let the length of the instructions put you off. Also, Zaar needs me to list two ingredients in the ingredient list, but in all honesty this recipe is best suited to cloth serviettes, and the bigger they are the better. The one in my photo series is the largest serviette I have. Fill this with a small bread roll... or anything else that you can think of for your guests."
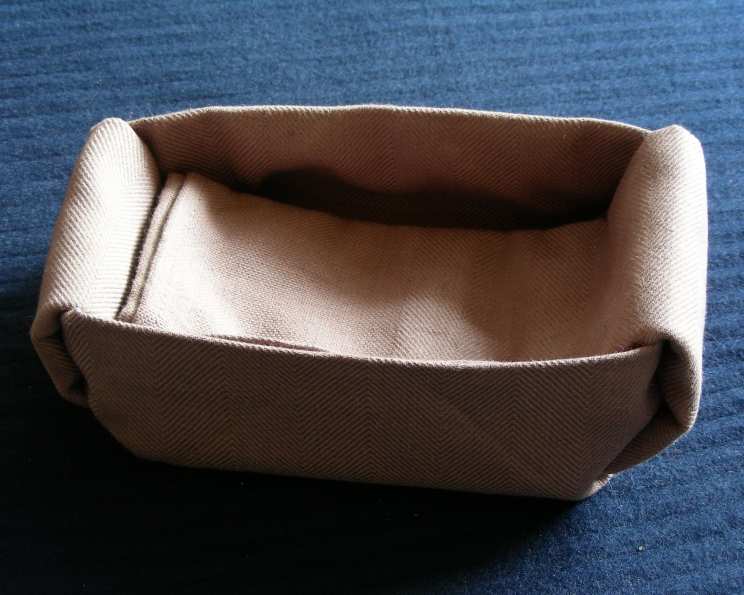
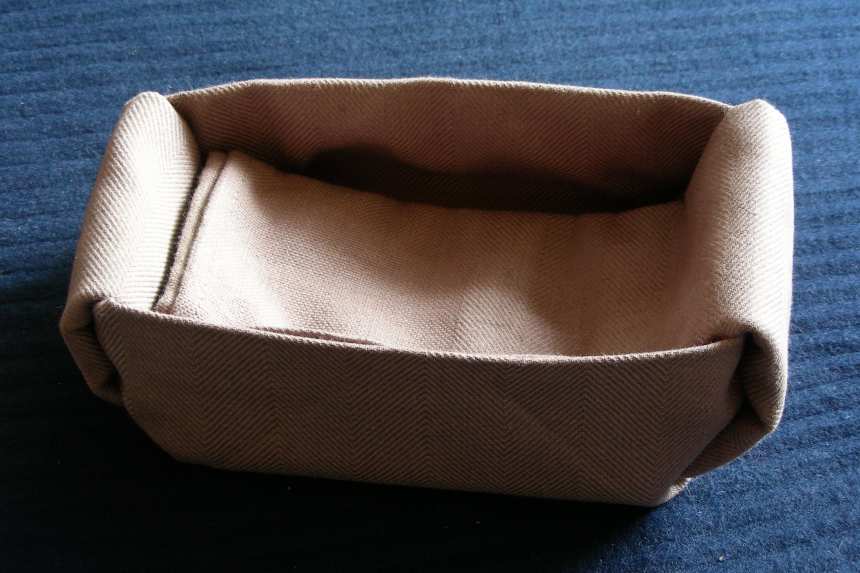
photo by kiwidutch


- Ready In:
- 5mins
- Ingredients:
- 2
- Serves:
-
2
ingredients
- 1 paper, serviette (large)
- 1 cloth, serviette (large)
directions
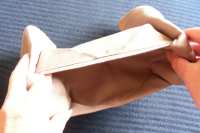
- Lay your serviette out flat before you in a square.
- Take the top left and top right corner and bring them 1/3rd of the way down the square.
- Now take the bottom left and bottom right corners and bring them up to meet the new corners at the top. You will have before you a long rectangle that is 1/3rd the width of your original servietter square.
- Take the top let and bottom let corners and fold them 2/3rd of the way towards the right.
- Place your finger about half way down the line that now runs vertically down the serviette at the 2/rd mark, and with your other hand, bring the bottom right corner of the flap folded in the previous step, up to meet your finger in the center. This should produce a horizontal band in the center if the left 2/3rd of the serviette, and the bottom left corner should turn into a triangle.
- Now repeat by bringing the top right corner of the flap at 2/3rds down to meet the bottom crease fold of the band you just made. Once it's flattened out it there will second band directly above the first and another triangle will appear in the top left corner of the serviette.
- Take the free end of the band in the center of the serviette and fold it back over to the left so that it sticks out to the left, past the left edge of the serviette.
- Now take the top right and bottom right of the serviette and bring it over to the left so that what *were* the right edges of the serviette not are level with the outer edge of the band that's sticking out on the left. You will have before you a square shape.
- Place your finger in the center of the left edge and with your other hand, bring the bottom left corner up to meet your finger. This should make a flat horizontal band in the middle again and a triangle will form in the bottom right corner.
- Finish this band by bringing the top left corner of the serviette down to meet the bottom crease mark of the band you have just made, and as before a second band will form directly above the first and the last triangle should form in the top right corner.
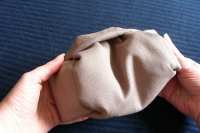
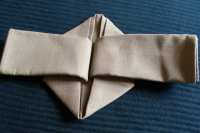
- As with the previous side, take the long loose end of the band on the left and fold it back on itself so that it sticks out on the right side. Your serviette will now look something like a rowboat with very fat oars in the middle that stick out on each side.
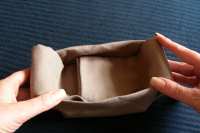
- Place your fingers inside the triangles in the center of the serviette and holding the left and right ends very firmly, turn the serviette inside out. It will look a tad messy at first but the square box form should be there, and I neatened mine up considerably by easing everything into place.
- To make this serviette really impressive, carefully hold the little serviette basket open on each side in turn, while ironing the inside of the four sides.
- Fill your basket with a bread roll, a cookie, a few crackers, a small gift, party favours and confetti -- in fact, whatever takes your fancy.
Questions & Replies

Got a question?
Share it with the community!
Reviews
-
 Cute Basket! Wonderful tutorial and great easy to follow pictures! Thank you for posting. It will make a lovely snack basket for my Moses in the Basket lesson and for my service is sweet ladies party coming up.
RECIPE SUBMITTED BY

kiwidutch
Netherlands


