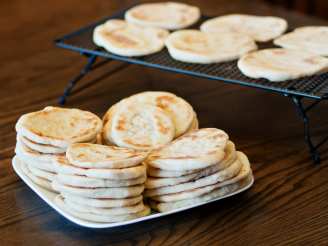
Make Ahead Pita Bread

"Fresh homemade pita - made with white and whole wheat flours - are easy to make and delicious. They are best when baked on a baking stone or unglazed quarry tiles but you can also place them on baking sheet or other heavy skillet or griddle at least 9 inches in diameter. Pita bread can be wrapped airtight and frozen for up to 1 month. Thaw first, then reheat on a baking sheet in a 350F oven before serving. This recipe is great to use for a Lite-Bleu meal. All Lite-Bleu recipes are complete meals that we designed for our weight loss diet."
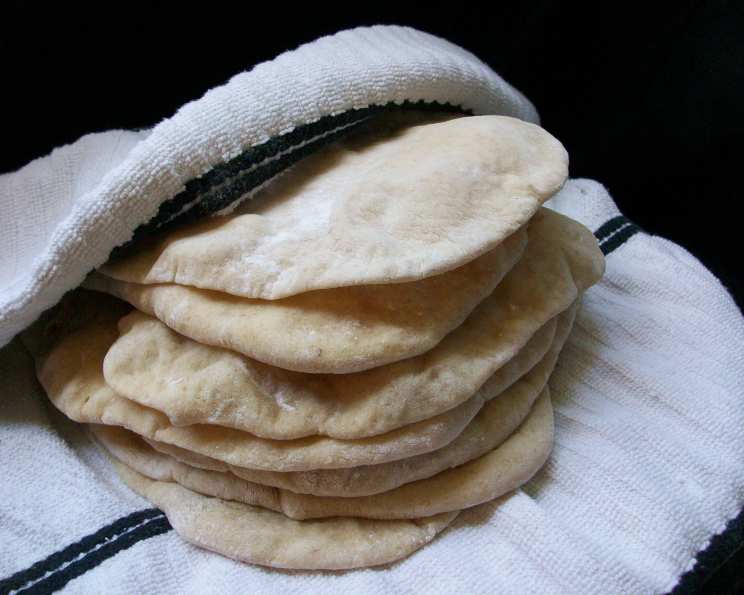

photo by 2Bleu


- Ready In:
- 24mins
- Ingredients:
- 6
- Yields:
-
16 Pitas
- Serves:
- 16
ingredients
- 1 teaspoon active dry yeast
- 2 1⁄2 cups water (approximately 105 degrees F)
- 1 cup whole wheat flour
- 3 cups all-purpose flour (or bread flour)
- 1 tablespoon salt
- 2 tablespoons olive oil
directions
- Sprinkle the yeast over the warm water in a large bread bowl. Stir to dissolve. Add whole wheat flour, then 1 cup white flour. Stir 100 times (one minute) in the same direction to activate the gluten in the flour. Let this sponge rest for at least 30 minutes or as long as 2 hours.
- Sprinkle salt over the sponge and stir in the olive oil. Mix well. Add remaining white flour, one cup at a time (more if needed). When the dough is too stiff to stir, turn it out onto a lightly floured bread board and knead for 8 to 10 minutes, until dough is smooth and elastic. Return the dough to a lightly oiled bread bowl and cover with plastic wrap. Let rise until at least double in size, approximately 1 1/2 hours.
- Gently punch down. NOTE: If at this time you want to save the dough in the refrigerator for baking later, simply wrap it in a plastic bag that is at least three times the size of the dough, pull the bag together, and secure it just at the opening of the bag. This will give the dough a chance to expand when it is in the refrigerator (which it will do). From day to day, simply cut off the amount of dough you need and keep the rest in the refrigerator, for up 5 days. The dough will smell slightly fermented after a few days, but this simply improves the taste of the bread. Dough should be brought to room temperature before baking.
- Place unglazed quarry tiles, or a large baking stone or two baking sheets, on a rack in the bottom third of your oven, leaving a one inch gap all around to allow air to circulate. Preheat oven to 450 degrees.
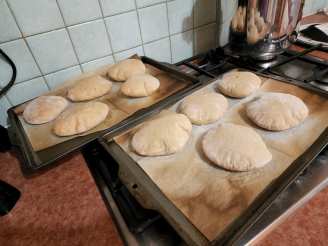
- Divide dough in half, then set half aside, covered, while you work with the rest. Divide dough into eight equal pieces and flatten each piece with lightly floured hands. Roll out each piece to a circle 8" in diameter and about 1/4" thick. NOTE: You may wish to roll out all eight before starting to bake. Cover rolled out breads, but do not stack.
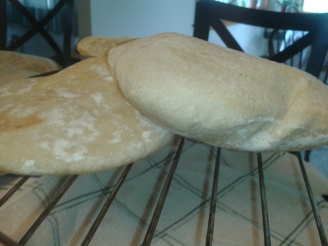
- Bake 2 at a time (or more if your oven is larger) directly on quarry tiles or baking sheets. Bake each bread for 3-4 minutes, until the bread has gone into a full "balloon" or until it is starts to turn lightly golden, whichever happens first. NOTE: Your bread may not go into a full "balloon" but don't worry, it will still taste great. The more you bake pitas the more you will become familiar with all the little tricks and pitfalls, and your breads will more consistently balloon.
- Remove pitas from the oven and place on a rack for for a few minutes to let cool slightly (I leave them on the rack until the next two are ready to come out of the oven), then wrap breads in a large kitchen towel (this will keep the breads soft).
Questions & Replies
-
 I have a question for 2Bleu & Chef Tweaker regarding the discrepancy in the amount of flour. I am an experienced baker and know from experience that the brand of flour used really does make a big difference. I use only King Arthur Flour for this reason. It really is a superior flour, as most hard-core hobbyists will tell you. What brand of flour did each of you use? Particularly interested in the brand the recipe itself was based on.
Reviews
-
 Oh boy, do I need some practice rolling dough! The flavor of these is excellent, I just have some funny looking pitas LOL! They got better as I went--I took the advice of a previous reviewer and sort of "kneaded" the dough over then rolled with the air pocket intact and that seemed to work. The dough was sometimes hard to work with (sorta springy, don't know how to fix besides letting it rest) and sometimes I used a sort of "pizza crust" approach using my fingers and gravity instead of the rolling pin. Like I said, I'm new at this. I did have to bake these about double the amount of time stated, and I had some difficulty with the pitas sticking to the baking stone. I had to add about 1 c more flour than called for. Thanks for posting--puffy or not this is a yummy bread and I don't mind making it again to work on my skills! Made for PRMR 2008.
 -
 The end result (after tweaking) was very good but I would not recommend this recipe to someone who has not made yeast breads before. When I followed the recipe as directed... the dough was not even close to being a "kneadable" texture. I had to add approximately 3 more cups of flour. Also the dough seemed quite salty in the beginning but was just right with the added flour. With the first half-batch I had trouble getting the dough to puff up and also getting it to brown. It felt like I left it in for a long time and would finally take it out in spite of not browning. The flavor was still good but I wanted "stuffable" pitas. I posted on the Greek forum and was told to "knead it over on itself but leave the little air pocket, then roll out with a rolling pin." I tried that with the 2nd batch and it worked beautifully. However, just puffing up was not an indication of doneness. In my gas oven it took approximately 6 minutes to get them to brown. I'm still playing around with the timing but I will try this again. Maybe if I still need to add more flour than called for I will try to add more whole wheat flour since I like the flavor that it gives.
 -
 Mine turned out perfect. They all bubbled without a problem and they taste great! I did have to add almost 3 cups of flour to get it kneadable. That is common with bread, but it does change the calorie count quite a bit! Thanks for the great recipe!
 -
 This is a EXCELLENT recipe! The dough was very easy to work with and they ballooned up beautifully, each one of them!! Thank you, 2Bleu, for sharing this wonderful recipe, I definitely will be making it again!
 -
 This recipe makes a wonderful pita bread ! It was my first time baking this kind of bread and I had a little trouble rolling out the pieces in a circle. You may have to let the dough rest a couple of minutes, repeating the rolling process a few times. The bread was very tasty ( even tasted better after the dough was kept for 3 days in the refrigerator.) Thank you for the recipe !!! Made for Photo Swap.
RECIPE SUBMITTED BY

2Bleu
Duncan, South Carolina
Original Zaaarite. Food lovers.
Lynnda passed away in March 2020. Her recipes live on here for everyone to enjoy and Rick continues the tradition. We will forever live together through our food. Live well. Eat well.?