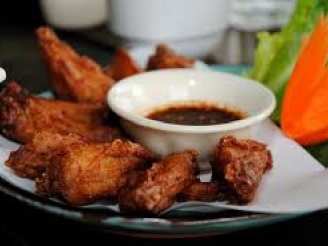
Dehydrator Dried Bacon

- Ready In:
- 6hrs 10mins
- Ingredients:
- 2
- Yields:
-
3 ounces
ingredients
- 1 lb sliced bacon
- paper towels (added to pass editing)
directions
- Cut the sliced bacon into strips that are 1 inch long and 1/4 inch wide.
- In a skillet, saute the bacon until crisp, then drain the pieces on paper towels.
- Line each drying tray with a solid "fruit leather" sheet (parchment paper can be substituted). Top it with a mesh sheet.
- Arrange the bacon pieces in one layer on the mesh sheet. Put the drying trays in the dehydrator. Twice during the drying process, remove the drying bacon and wipe it with paper towels to remove as much of the fat as possible. Return the bacon to the drying trays.
- Dry the bacon until it crumbles easily, about 6 to 8 hours, depending on the make of the dehydrator.
- One pound of bacon weighs 2 to 3 ounces dried.
Questions & Replies
Got a question?
Share it with the community!
Reviews
Have any thoughts about this recipe?
Share it with the community!
RECIPE SUBMITTED BY
TxGriffLover
Fort Worth, TX
I'm a graphic artist, living in beautiful Fort Worth, TX. Next to my love of music, cooking and trying new recipes, I am involved in animal rescue. I currently have 2 rescued Brussels Griffons, 2 foster Griffs and 3 funny parrots. I maintain a store on Cafe Press to raise funds to pay for vet bills for our rescued Brussels Griffons. Please visit our store at http://cafepress.com/griffy_rescue
or our main rescue site at http://brusselsgriffonrescue.org
<img src="http://img.photobucket.com/albums/v726/annacia/Permanent%20Banners/cc-banner-7-09.jpg" border="0" alt="Photobucket"></a>
<img src="http://i23.photobucket.com/albums/b399/susied214/permanent%20collection/participantbannerzwt5.jpg" border="0" alt="Photobucket"> <img src="http://www.recipezaar.com/members/home/79877/hklogosm.jpg">
ZWT5 was my first, and I loved it. We had a great team.
<img src="http://www.recipezaar.com/members/home/79877/hkban.jpg">
My current ZWT5 team banner for the first leg.
<img src="http://www.recipezaar.com/members/home/79877/HKBIKE2.jpg">
We started out nice!
A Hell's Kitchen Angel's graphic I made for our second leg. Things started to heat up!
<img src="http://www.recipezaar.com/members/home/79877/hkbanknives.jpg">
By the end, we were HOT! The banner for our last leg with all our team members! What a blast!
<img src="http://i250.photobucket.com/albums/gg271/MrsTeny/Permanent%20Collection/PACSpring09Iwasadopted.jpg"><img src="http://i250.photobucket.com/albums/gg271/MrsTeny/Permanent%20Collection/PACSpring09Participation.jpg">
<img src="http://i23.photobucket.com/albums/b399/susied214/permanent%20collection/IWasAdoptedfall08.jpg" border="0" alt="Photobucket">
<img src="http://i10.photobucket.com/albums/a132/tgifford/Game%20Room%20Banners/AM%20Banners/potluckpbanner.jpg" border="0" alt="Photobucket"><img src="http://i270.photobucket.com/albums/jj81/HokiesLady65/Recipezaar%20Album/iplaytagin.jpg">
<img src="http://i147.photobucket.com/albums/r317/j_welcome/pics2/food/PRMRcopy.jpg">


