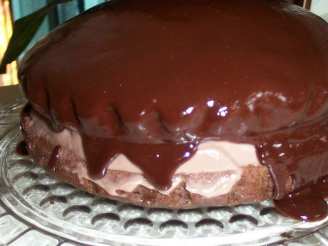
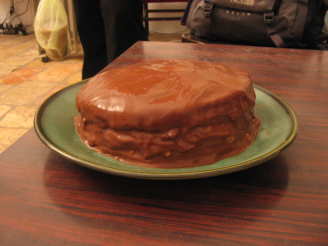
Boston Cream (Creme) Pie

"The Parker House Hotel in Boston is credited with inventing this fine dessert. Traditionally, the "pie" is actually white cake with custard (or pastry cream), topped with a chocolate glaze. It's the official dessert of Massachusetts and the Boston Cream donut is the official donut. I couldn't find a Boston Cream Pie recipe that called to me, so I created one using my favorite cake, glaze, and pastry cream recipes. It was a huge hit with my family! If you want Boston Cream Cupcakes, use a pastry bag with tip to inject the cream into the cupcake before glazing. Use Bourbon (Madagascar) vanilla beans for best results. This recipe looks complex, but it's actually pretty easy. Time does not include cooling."

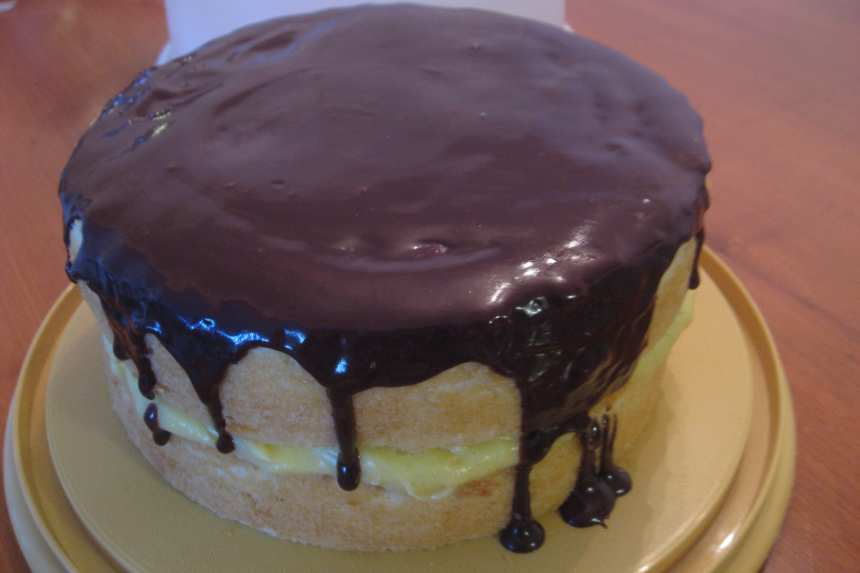
photo by Scarlett516

- Ready In:
- 1hr 30mins
- Ingredients:
- 24
- Serves:
-
12
ingredients
-
The Cake
- 2 1⁄4 cups cake flour
- 1 tablespoon baking powder
- 1⁄2 teaspoon salt
- 1 1⁄4 cups whole milk or 1 1/4 cups buttermilk
- 4 large egg whites
- 1 1⁄2 cups sugar
- 1⁄2 vanilla bean, split and scraped
- 1⁄2 cup unsalted butter, room temperature
- 1⁄2 teaspoon vanilla extract
-
The Pastry Cream
- 2 cups milk
- 1⁄2 vanilla bean, split and scraped, keep pod
- 6 large egg yolks
- 2⁄3 cup sugar
- 2 tablespoons flour
- 2 tablespoons cornstarch
- 4 tablespoons unsalted butter, room temperature
-
The Chocolate Glaze
- 1⁄3 cup heavy cream
- 3 1⁄2 ounces bittersweet chocolate, finely chopped
- 4 teaspoons unsalted butter, cut into 4 pieces, at room temperature
- 7 tablespoons chocolate syrup
-
The Chocolate Sauce
- 4 1⁄2 ounces bittersweet chocolate, finely chopped
- 1 cup water
- 1⁄2 cup creme fraiche or 1/2 cup heavy cream
- 1⁄3 cup sugar
directions
-
The Cake:
- Center a rack in the oven and preheat to 350°F Butter 2 9" cake pans and line with parchment paper.
- Sift together the cake flour, baking powder, and salt.
- In a separate bowl, whisk together the egg whites and the milk.
- In another bowl, whisk together the vanilla seeds and sugar until blended and fragrant.
- Add the butter to the vanilla and sugar mixture and beat at medium speed for three minutes or until butter and sugar are light.
- Incorporate the extract and 1/3 of the flour mixture.
- Beat in 1/2 the milk/egg mixture and then incorporate 1/2 the remaining flour mixture.
- Add the rest of the milk/egg mixture, then add the rest of the flour mixture.
- Beat for about 2 more minutes until all the ingredients are fully incorporated and the batter is well aerated.
- Divide the batter between the two pans, and smooth the tops with a spatula.
- Bake 30-35 minutes until the cake is springy to the touch and a toothpick comes out clean. Cool for about 5 minutes in the pan, then invert onto wire rack and allow to cool the rest of the way.
-
While the cake is baking, start the pastry cream:
- Bring milk, vanilla seeds, and vanilla pod to a simmer.
- Meanwhile, combine sugar, flour, and cornstarch in a bowl.
- Whisk until smooth.
- Add the egg yolks and whisk until smooth and lump-free.
- Remove the vanilla pod from the milk.
- Temper the egg mixture with the milk by pouring the milk little by little into the egg mixture to prevent the egg from scrambling.
- Once the egg mixture is tempered, add the mixture back into the sauce pan and cook over medium-low heat until boiling.
- Boil for 1 minute.
- Remove from heat and stir in butter.
- Strain into a bowl or container. Cover with cling film, pressed against the top to prevent a skin.
- Chill thoroughly in the fridge.
-
While the cake is cooling, start the chocolate glaze:
- Begin with the chocolate sauce by putting the bittersweet chocolate, water, creme fraiche (or heavy cream) and sugar into a heavy bottom sauce pan. Bring to a boil, stirring constantly with a wooden spoon.
- Reduce heat to low and and stir until sauce thickens enough to coat the back of a wooden spoon (10-15 minutes).
- To make the glaze, bring the creme fraiche (or heavy cream) to a boil in a small sauce pan.
- Remove from heat and slowly add the chopped chocolate, stirring with a wooden spoon.
- Continue stirring gently, adding the butter piece by piece until fully incorporated.
- Once the butter is incorporated, add the chocolate sauce and stir to combine.
- This glaze does cool enough to spread with an offset spatula, but it's best to keep it warm for pouring over the pie.
- Now it's time for the assembly!
- Using a bread knife or cake leveler, level the tops of the cakes. Place one layer right side up.
- Cover with pastry cream (about 1/4"-1/3" thick layer is best).
- Place the other cake layer upside down on top of the pastry cream.
- Press the cake down a but until the pastry cream just peaks out from the sides of the cake.
- Slowly pour the chocolate glaze over the center of the top of the cake. If needed, use an offset spatula to guide the glaze toward the edge. Stop pouring once the glaze reaches the edge of the cake. Allow a bit of the glaze to drip down the sides.
- Store in refrigerator. Serve cold or at room temperature.
Questions & Replies

Got a question?
Share it with the community!
Reviews
-
 Oh my goodness this did take some work, but it wasn't as complecated as I though it would be. Well worth the time it took to make. It was fabulous, and tasted even better than it looked.(lol..lol..lol..) Great for a special occasion. Thanks for sharing your receipe.
RECIPE SUBMITTED BY

I joined Recipezaar to learn new recipes that are home cooked. I grew up having ready-meals like Encor and Stouffers and needed recipes that don't simply require opening a box and plopping in the oven! I enjoy cooking when I have the time to try new dishes. I make every recipe as written if I'm reviewing it to give a true review. If I make alterations that aren't in the directions, I don't feel it's a true reflection of the recipe; it's another recipe to me.
<img src="http://i23.photobucket.com/albums/b399/susied214/permanent%20collection/participantbannerzwt5.jpg" border="0" alt="Photobucket">
<img src="http://i23.photobucket.com/albums/b367/chefpaulag/final-1.jpg">
<img src="http://i23.photobucket.com/albums/b399/susied214/permanent%20collection/captain.jpg" border="0" alt="Photobucket">
<img src="http://www.recipezaar.com/members/home/329769/ninja%20bmp.jpg" width=75%>
(Zaar World Tour 4)
<img src="http://i23.photobucket.com/albums/b399/susied214/permanent%20collection/adoptedspring08.jpg">
<a href="http://s7.photobucket.com/albums/y254/Missymop/?action=view¤t=cunningcrocodiles.jpg" target="_blank"><img src="http://i7.photobucket.com/albums/y254/Missymop/cunningcrocodiles.jpg" border="0" alt="Photobucket"></a>
<img src="http://i26.photobucket.com/albums/c105/jewelies/DSC_0020.jpg">
(Australia/New Zealand Swap #15)