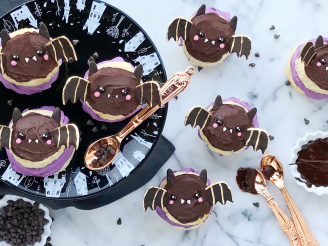
Batty Ube Cream Puffs
"These cute cream puffs are scary good, and scary simple! Puff pastry and vanilla pudding mix make the process totally painless, and the spiced ube gives them a unique flavor (almost like a gingersnap cookie) and color that screams Halloween. Light, airy, and full of flavor these batty treats are sure to vanish fast! The filling, chocolate decorations, and puff pastry can all be made ahead, so that it's a snap to assemble for a party or festive dinner. "
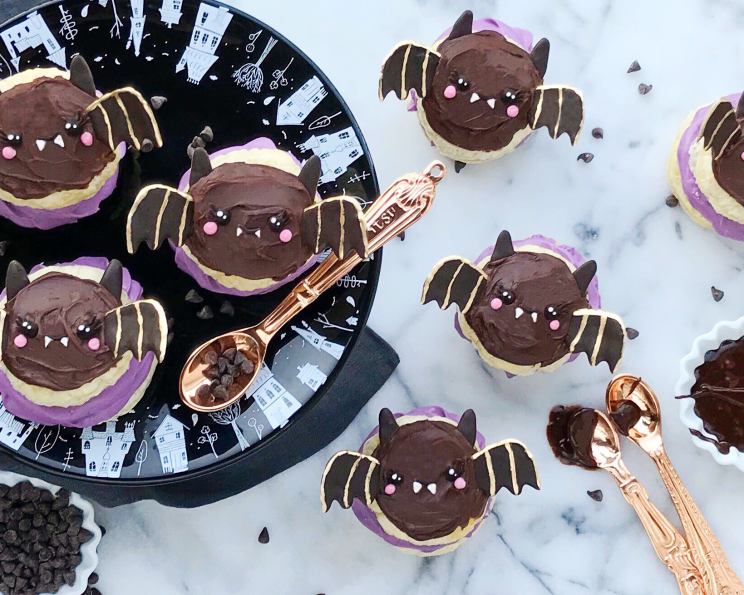
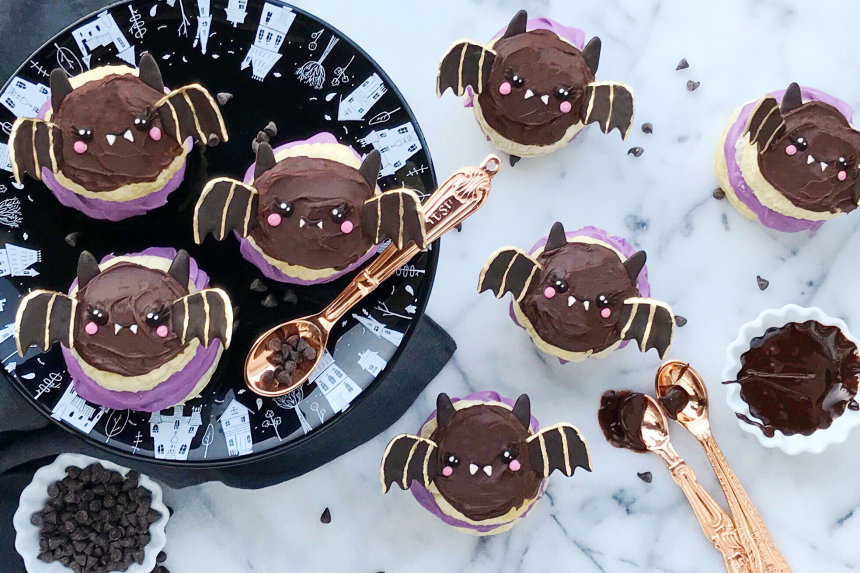
photo by luxeandthelady


- Ready In:
- 57mins
- Ingredients:
- 17
- Yields:
-
9 Cream Puffs
- Serves:
- 9
ingredients
-
Spiced Ube Cream
- 1⁄2 cup cold heavy whipping cream
- 1 tablespoon powdered sugar
- 1 cup cold milk
- 3 1⁄2 ounces vanilla pudding mix
- 1⁄4 teaspoon ube flavoring
- 1⁄8 teaspoon ground cinnamon
- 1⁄16 teaspoon ground nutmeg
-
Pastry
- 1 (18 1/3 ounce) package all butter puff pastry sheets (thawed)
- 1 large egg
- 1 teaspoon cold water
-
Batty Decorations
- 6 ounces dark cocoa, candy melts
- 1⁄4 teaspoon edible gold luster dust
- 1⁄8 teaspoon vanilla extract
- 4 1⁄4 ounces white decorating icing
- 4 1⁄4 ounces pink decorating icing
-
Chocolate Ganache
- 1⁄2 cup semi-sweet chocolate chips
- 1⁄4 cup heavy whipping cream
directions
- Before getting started, you will need: wax paper, toothpicks, 2 1/2 inch circle cookie cutter, pastry brush or clean paper towel, #2 piping tip with coupler, pastry bag, 1M piping tip with coupler, and a thin food quality brush.
- Chill mixing bowl and whisk attachment in the freezer for 15 minutes.
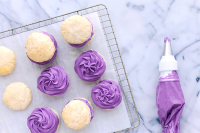
- Add the cold cream and powdered sugar to the mixing bowl. Beat starting on low, and slowly increasing to high speed until stiff peaks form. .
- In a medium sized mixing bowl, whisk the cold milk and vanilla pudding mix together for 2 minutes. Add the ube flavoring, cinnamon, and nutmeg, and stir to combine. Gently fold in the whipped cream. Cover and transfer to the refrigerator.
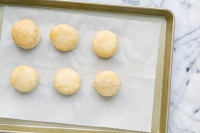
- Preheat the oven to 400 degrees Fahrenheit. Line a baking pan with parchment paper, and chill it, along with your cookie cutter, in the refrigerator until the oven is ready.
- Cut 9, 2 1/2 inch circles out of each sheet of thawed (but still cold to the touch) puff pastry with the cookie cutter. If needed, lightly flour your cutter and work surface. Just press the cutter down - twisting to cut the shape out will compress the pastry layers (keeping them from puffing up). Transfer 9 of the cut out circles to your prepared baking pan.
- Whisk the water and egg together, in a small bowl, and use either a pastry brush or clean paper towel to brush a little of the egg wash into the center of each cut out on your baking pan. Top each with a second circle of puff pastry. .
- Bake for 12 minutes, or until the pastry is just starting to turn golden brown. Place the pan on top of a cooling rack to cool for 10 minutes before splitting each puff pastry in half with a knife. Set aside.
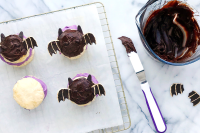
- Transfer the candy melts to a heatproof bowl, and heat, in the microwave, for 1 minute at 50% power. Stir, and continue to heat in 30 second intervals at 50% power, until completely melted. You can add either paramount crystals or vegetable oil, 1 teaspoon at a time, if needed to thin and smooth the melts.
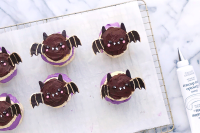
- Use a toothpick dipped into the candy melts to "draw" the wings, ears, eyes, and smiles for each bat onto wax paper. You can also draw the design first and place the drawing underneath the wax paper, as I did, for a guide. Allow to set.
- Once the candy melt pieces are set you can paint the wings with the gold dust! Mix the vanilla extract and edible dust together in a small bowl or cup, and use the food brush to paint the outline and veining onto each wing. Allow to dry before handling.
- Let's make the chocolate ganache, and put it all together! Heat the chocolate chips and cream, in a heatproof container, for 1 minute in the microwave. Whisk until the chocolate chips are completely melted. Transfer to the refrigerator for 15 minutes to thicken.
- Transfer the ube filling to a piping bag fitted with the 1M tip (or any large piping tip you prefer). Fill each puff pastry, evenly, and store any extra filling in the refrigerator.
- Use the back of a spoon or butter knife to frost the top of each puff pastry with the chocolate ganache. Add the wings, ears, eyes, and mouth to each.
- Fit the white decorating icing with the #2 piping tip, and pipe the highlights on the eyes and fangs. Clean the piping tip, and transfer it to the pink decorating icing. Pipe the cheeks under each bat's eyes. Admire your spooktacular work and enjoy!
Questions & Replies

Got a question?
Share it with the community!
Reviews
Have any thoughts about this recipe?
Share it with the community!
RECIPE SUBMITTED BY
luxeandthelady
United States
While some artists like to use photographs or paint to bring their art to life, I like to use my favorite thing in the world - food! I believe in balance, and enjoy making a combination of sweets and healthy treats all dressed up as my favorite animals and characters :)