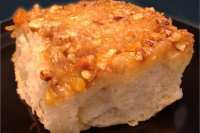
Coconutty Orange-Apricot Sticky Buns

"Tantalize your taste-buds with these tender sweet buns! The
orange-apricot filling which spirals through them bursts with abundant flavor and a nutty gooey glaze adds the final decadent touch -- Mmmm! -- I happily created these sticky buns for the Ready Set Cook #9 Contest."

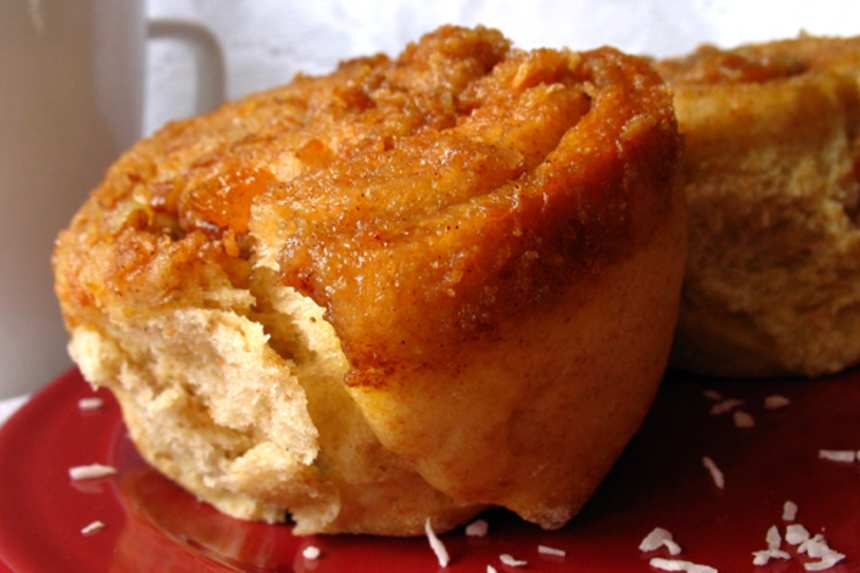
photo by LUv 2 BaKE


- Ready In:
- 3hrs
- Ingredients:
- 20
- Serves:
-
12
ingredients
-
Dough
- 1 (1/4 ounce) packet active dry yeast (2 1/4 teaspoons)
- 1⁄4 teaspoon sugar
- 1⁄4 cup warm water
- 1 large egg
- 1 cup unsweetened coconut milk
- 1⁄4 cup butter, softened
- 1⁄3 cup sugar
- 1 teaspoon salt
- 4 1⁄4 cups all-purpose flour
-
Glaze
- 3⁄4 cup butter, softened
- 1⁄2 cup brown sugar, packed
- 1 teaspoon orange zest
- 1 teaspoon freshly-squeezed orange juice
-
Filling
- 3⁄4 cup chopped pecans
- 3⁄4 cup lightly toasted coconut
- 1⁄2 cup chopped dried apricot
- 1 teaspoon orange zest
- 1⁄2 cup white sugar
- 1 1⁄2 teaspoons cinnamon
- 2 tablespoons melted butter
directions
- Sprinkle yeast and sugar over warm water;let stand about 5 minutes until foamy.
- Stir together proofed yeast mixture, egg, coconut milk, butter, sugar, salt, and 1-2 cups of the flour; gradually stir in remaining flour (a KitchenAid stand mixer or bread machine may be used) until a very soft and somewhat sticky dough comes together;add additional flour a tablespoon at a time if necessary to preclude excess stickiness, but be careful not to add too much.
- Knead (a KitchenAid stand mixer or bread machine may be used) about 8 minutes until dough is smooth and still soft.
- Place dough into oiled bowl; cover bowl and put in a warm place; allow dough to rise about 1 1/4 hours until doubled.
- Meanwhile, cream together butter, brown sugar, orange zest, and orange juice to make the glaze; spread glaze evenly across the bottom of a 9x13" baking pan.
- Combine pecans, coconut, apricots, orange zest, sugar, and cinnamon (save the melted butter for later) to make the filling; stir and toss to mix well.
- Measure out 1 cup of the filling and sprinkle it evenly over the glaze already in the baking pan; set remainder aside.
- Once dough has doubled; punch it down then turn out onto a lightly floured surface such as a large cutting board or clean countertop; roll or pat the dough into a 12x18" rectangle.
- Brush dough rectangle with 2 tablespoons melted butter; sprinkle remaining filling evenly over the dough, leaving a 1" margin along one of the long sides.
- Roll the dough up jelly-roll-style,beginning with the long side without a margin, into a tight cylinder, ending at the long side with the margin; pinch along the long seam and at the ends to seal the roll shut.
- Cut (see the NOTE below for a very easy cutting method) the roll into 12 even pieces, each about 1 1/2" wide; arrange the cut pieces, pretty-side down, on top of the glaze in the baking pan.
- Cover the pan and allow the buns to rise about 45 minutes or until once-again doubled.
- Bake at 350°F for 30-35 minutes until the buns are golden-brown with sugar bubbling up between them; cool in baking pan 5 minutes, then invert onto a baking sheet; continue to cool a few minutes longer then pull apart the sticky buns; serve while still warm or cool completely.
- NOTE: Using both hands, slide a two-foot length of plain dental floss under the dough roll; bring the ends of the floss up and across each other at the place you want to cut; pull the floss tight to make a very clean cut straight through the dough.
Questions & Replies

Got a question?
Share it with the community!
Reviews
-
 This is a great recipe. If you like sticky buns that is. the flavours were really good. I shared with my neighbors, and they agreed it should win a contest!
 -
 If you love the real 'ol fashioned cinnamon rolls like I always have, you should LOVE these buns as well! These are sooo finger-lickin' good that you'll have a difficult time stopping after eating just 2 or 3! The combo of flavors is so delicious! A great dessert for company if only you can keep them around long enough!!
 -
 WOW. These are outstanding!!! The oh so soft dough just seems to melt in your mouth, while the incredibly fragrant, flavourful toasted coconut combined with the apricot, orange and pecans give a deliciously sweet result. I am very impressed with this recipe! The dough seemed to rise fairly slow for me, but since the buns rose a lot in the oven while baking it didn't matter. I used light coconut milk, and a little less 1/4 cup of butter for the glaze (to decrease the fat content a bit) which worked nicely for me. I think these would be just as delicious without the glaze. Thank so much for a wonderful winner of a recipe. Reviewed for RSC #9.
RECIPE SUBMITTED BY

Debs Recipes
United States
A happily married wife and mom of two young adults, who enjoys a variety of creative pursuits including a love of cooking and baking. I also enjoy gardening, nature, travel, and skiing.
<img src="http://www.recipezaar.com/members/home/55221/homemadepastaforzaarpage.jpg">
Recipezaar is my favorite cooking website. I can't believe eight years have passed since I first found this wonderful cooking community! Life circumstances have recently kept me away, but I hope to be back soon. I really appreciate those who have kindly reviewed or photographed my recipes ~ <img src="http://img.photobucket.com/albums/v134/debsposies/Zaar/thankyou.jpg">
<img src="http://img.photobucket.com/albums/v134/debsposies/Zaar/aboutmepagefont.jpg">
<img src="http://img.photobucket.com/albums/v134/debsposies/pac2.jpg" hspace="3" vspace="5"><img src="http://img.photobucket.com/albums/v134/debsposies/pac6.jpg" hspace="3" vspace="5">
<img src="http://img.photobucket.com/albums/v134/debsposies/pac5.jpg" hspace="4" vspace="5"><img src="http://img.photobucket.com/albums/v134/debsposies/pac1.jpg" hspace="3" vspace="5">
<img src="http://img.photobucket.com/albums/v134/debsposies/pac3.jpg" hspace="4" vspace="5"><img src="http://img.photobucket.com/albums/v134/debsposies/pac4.jpg" hspace="4" vspace="5">
<img src="http://i80.photobucket.com/albums/j166/ZaarNicksMom/PACsticker-Adopted.jpg" hspace="0" vspace="4"><img src="http://i80.photobucket.com/albums/j166/ZaarNicksMom/Animation6.gif" hspace="0" vspace="4">
<img src="http://i3.photobucket.com/albums/y53/DUCHESS13/World%20Tour/ZWT2.gif" hspace="1" vspace="5">
<img src="http://i250.photobucket.com/albums/gg271/MrsTeny/ParticipationBanner.jpg" hspace="1">
<img src="http://i23.photobucket.com/albums/b399/susied214/craze-e2banner.jpg" hspace="2">
<img src="http://i23.photobucket.com/albums/b399/susied214/Dollar%20Contest/DiningonaDollarParticipant.jpg" vspace="3" hspace="4">
<img src="http://i3.photobucket.com/albums/y53/DUCHESS13/RSC%20Banners/RSC9-Debs.jpg"> <img src="http://i3.photobucket.com/albums/y53/DUCHESS13/RSC%20Banners/RSC10-Debs.jpg">
<img src="http://i3.photobucket.com/albums/y53/DUCHESS13/RSC%20Banners/RSC11-Debs.jpg"><img src="http://i3.photobucket.com/albums/y53/DUCHESS13/RSC%20Banners/RSC12-DebsRecipes.jpg" vspace="7">
<img src="http://i250.photobucket.com/albums/gg271/MrsTeny/RSC%20Lucky%2013/ParticipationSticker.jpg" hspace="8" vspace="3">
<img src="http://i23.photobucket.com/albums/b399/susied214/permanent%20collection/sticker.jpg" hspace="8" vspace="4">


