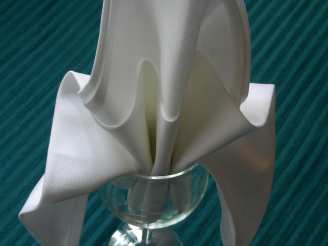
Serviette/Napkin Folding, the Fleur De Lis

"Between the teachings of my grandmother, an aunt, my mother and several restaurants I
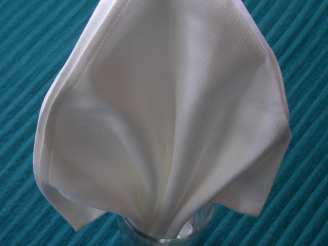
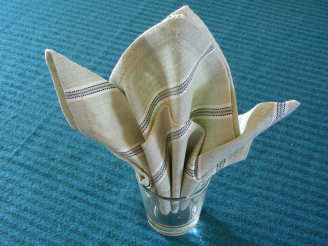
learned a lot about serviette/napkin folding. This one works well with cloth napkins, or larger paper ones.
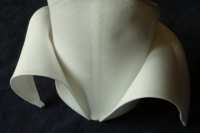
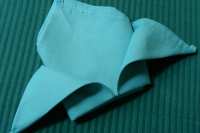
I have included step-by-step photographs to illustrate/supplement the written directions.
Another one from the Oasis Restaurant in Omarama, New Zealand. Looks good in a larger wine glass or on a plate.
Added: SusieQusie is correct in her review, In step 6, you can tuck either right side into left OR left side into right, when you tuck in at the back, yes, it's one tuck and not two. Sorry 'bout the confusion that may have caused."
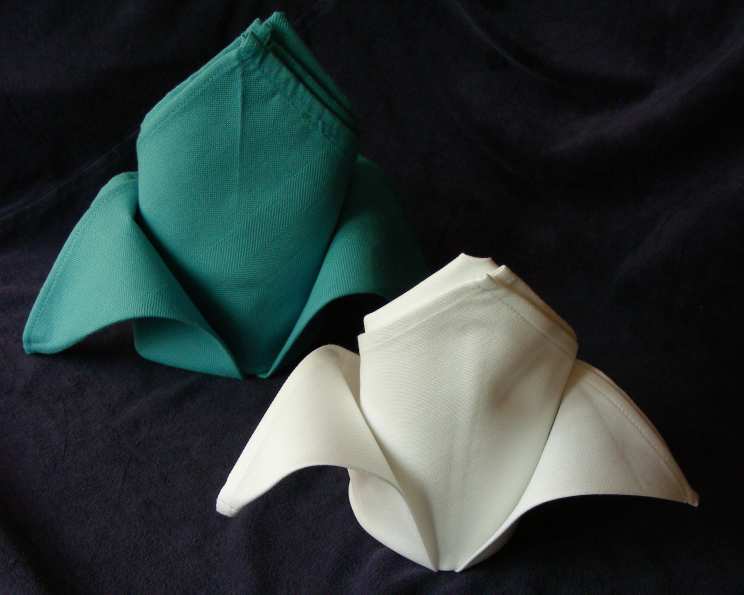
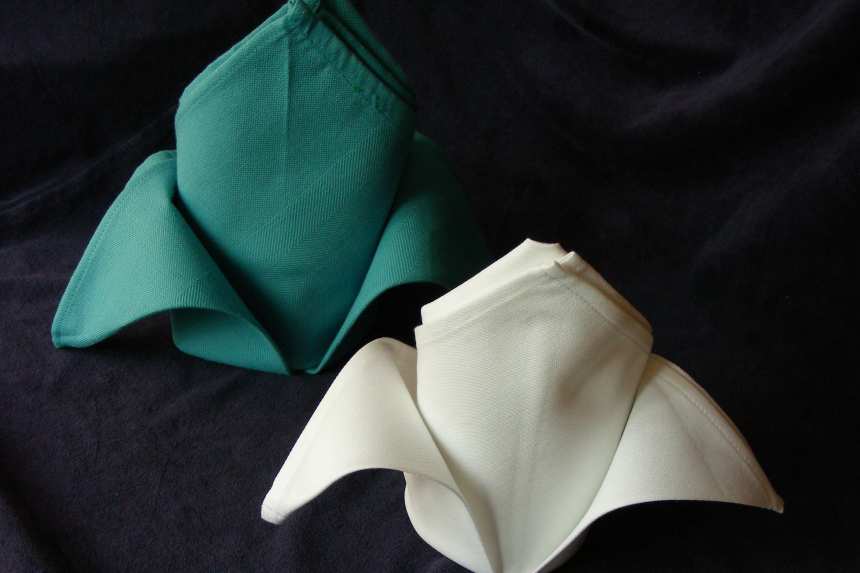
photo by kiwidutch


- Ready In:
- 3mins
- Ingredients:
- 2
- Serves:
-
2
ingredients
- 1 paper, serviette (large)
- 1 cloth, serviette (large)
directions
- Lay your serviette square out flat before you in a diamond shape.
- Fold the South point of the diamond up to meet the North point of the diamond.
- Fold the East point up to meet the North point of the diamond and repeat with the West point.You will now have a smaller diamond shape with a vertical gap running down the center.
- Carefully turn the serviette over.The point that has the open edges should be in the South of the diamond position.
- Fold these South points up to meet the North point, you will now have a triangle shape with a horizontal gap in the center.
- Turn the napkin over again and bring the East and West points into the center, tucking them inside each other.
- Turn the serviette over again and gently fold down the two outside flaps to make the petals of the Fleur-de-lis.
Questions & Replies

Got a question?
Share it with the community!
Reviews
-
 Easy, clear instructions. Mine came out looking just like the photos. How pretty!
 -
 Thanks for the great instructions. It was not nearly as hard as I invisioned! I must admit I tried Recipe #242372 first and could not get it to look quite right. I think if I had all cotton stiffly starched napkins that one would have worked however.
 -
 Thanks for posting all the pictures! Step 6 had me perplexed until I stared at the picture long enough to understand just what the _tucking them inside each other_ meant. Actually, I could only tuck in one side but my finished product looks close enough to suit me. Great fun!
 -
Very impressive! The directions were really easy to follow also!
RECIPE SUBMITTED BY

kiwidutch
Netherlands