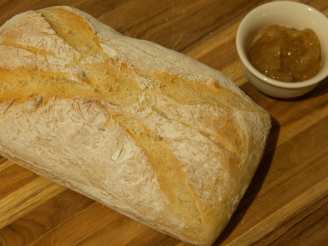
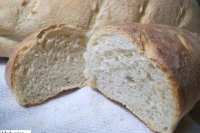
Artisan Italian Bread

"This recipe is for the serious bread maker. Use your KitchenAid for a lighter inside (perfect for subs and pasta dishes) or make it 100% hand-made which will produce a bread that is more dense and hearty (for dunking in soups and stews). Buddha says to 'be one with the bread' and make it by hand, but the starter makes 2 batches, so we suggest trying it both ways. You will need to begin making this bread the day before it's needed. The result is three very wonderful artisan loaves of Italian bread that is soft and airy on the inside, and light and crunchy on the outside. This recipe is an adaption of a recipe from Amy Scherber. We've made it simpler with quite a few modifications. :)"
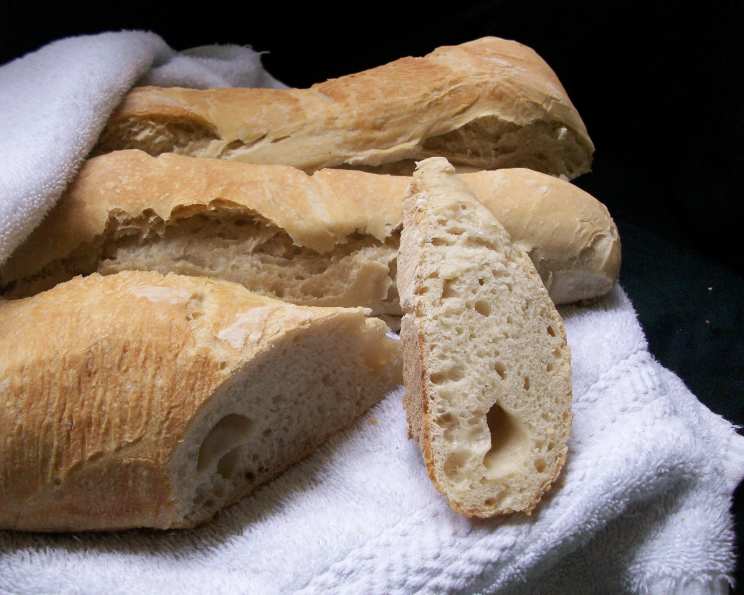
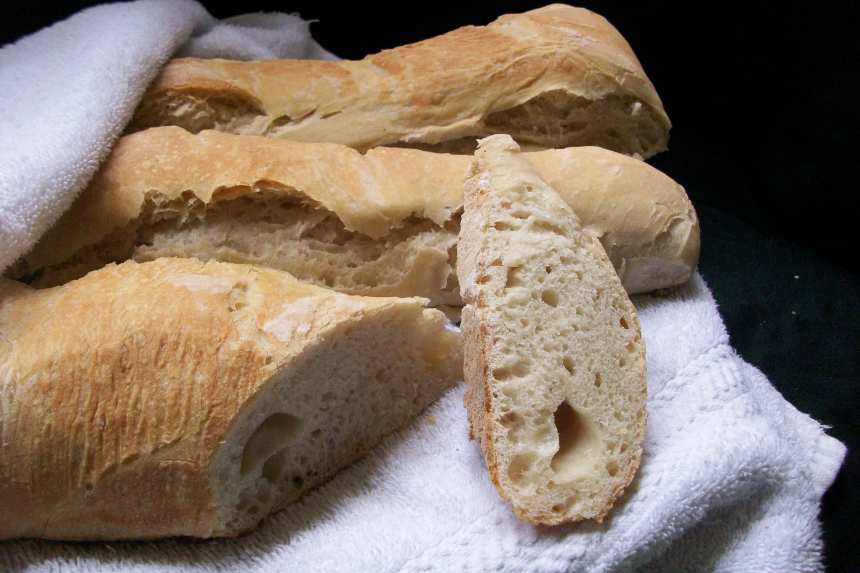
photo by 2Bleu


- Ready In:
- 45mins
- Ingredients:
- 8
- Yields:
-
3 Loaves
ingredients
-
Sponge Starter
- 1 1⁄2 cups water, 110 degrees
- 1 (1/4 ounce) package active dry yeast
- 3 1⁄2 cups unbleached all-purpose flour
-
Bread
- 1⁄4 cup water, 110 degrees
- 2 (1/4 ounce) packages active dry yeast
- 1 cup water, 75 degrees
- 3 1⁄2 cups unbleached all-purpose flour
- 1 tablespoon kosher salt
directions
- SPONGE STARTER (This makes enough for two recipe batches or 6 loaves): Mix all the sponge starter ingredients together using a KitchenAid with dough hook, on medium speed for 1 to 2 minutes until a somewhat elastic and very stiff batter has formed.
- Scrape the sponge into a plastic container and cover it with a see-thru lid (or plastic wrap). Let the sponge rest about 6 hours at room temperature until it has risen to the point where it just begins to collapse. The sponge will triple in volume and small dents and folds will begin to appear in the top as it reaches its peak and then begins to deflate. The sponge starter is now ready. NOTE: At this point you can refrigerate the starter and it can stay refrigerated for up to 1 month (just bring starter to room temperature before using).
- TO MAKE THE BREAD: Combine the warm water and yeast in your KitchenAid bowl and stir with a fork to dissolve the yeast. Let stand for 3 minutes.
- Add the cool water and 1/2 of the sponge starter to the yeast mixture and mix for about 1 minute, breaking up the sponge. The mixture should look milky and slightly foamy.
- Add the flour and salt and mix to incorporate the flour, scraping the sides of the bowl until the dough gathers into a mass. It will be wet and sticky, with long strands of dough hanging from the dough hook. If the dough is not sticky, add 1 tablespoon of water.
- Add a Tbsp or so of flour and knead for 2-3 minutes, until it becomes supple and fairly smooth. This is a sticky, wet dough; don't be tempted to add too much flour. Turn off the mixer, and using a large dish towel or plastic wrap, cover the bowl while still on the mixer and allow the dough to rest for 15 minutes (autolypse stage).
- Remove plastic wrap and knead the dough again for 2-3 minutes, until it is stretchy and smooth yet still slightly sticky. Dump the dough onto the counter and shape it into a loose ball, place it in a lightly oiled bowl, and turn the dough in the bowl to coat with oil. Cover the bowl tightly with plastic wrap and let the dough rise in a warm dark place for 1 hour then transfer the bowl to the refrigerator for 8 hours (up to 24 hrs) to let it relax, develop flavor, and become more manageable.
- Take the dough from the refrigerator and let it sit at room temperature for 2 hours, until it begins to warm up and starts to rise.
- Flour a work surface well and gently dump the dough onto it. Divide the dough into three equal pieces. Working with one piece at a time, gently flatten, pressing out some of the air bubbles, and stretch it into a rectangle(You can hold the dough up in the air and use the gravity to help form the rectangle). Fold the top third down and the bottom third up as if you were folding a business letter. Seal the seam with the heel of your palm, then repeat with the letter fold. (You want to gently draw the skin tight over the surface of the loaf while leaving some air bubbles in the dough or deflate its airy structure).
- Now form the loaf into a baguette by rolling the dough into a loaf shape. The loaves should now be about 10 inches long. Place loaf onto a sheet of parchment paper (cut to fit your stone) with enough room for the other two loaves.
- Make the other two loaves. The loaves will be soft and slightly irregular in shape. Leave space between the loaves as they will spread as they rise. Cover the loaves with well oiled plastic and let them rise for 2 hours.
- Place a baking stone in the oven on the 2nd rack from the bottom and preheat the oven to 450°F.
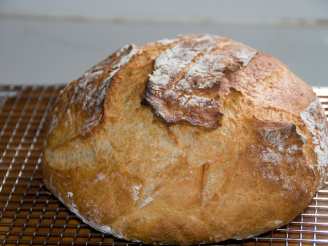
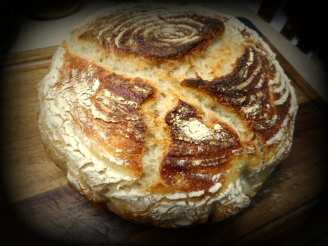
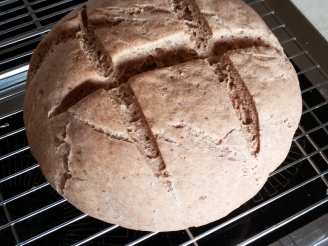
- Diagonally score each loaf in about 4 places about 1/8" deep, being careful not to deflate them too much. Carefully slide them with the parchment paper onto the baking stone in the oven.
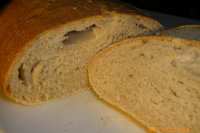
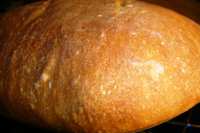
- Using a plant sprayer, quickly mist the loaves and the sides of the oven with water (careful not to spray the light bulb), then quickly shut oven door. Mist the loaves again after 2 minutes, and again after another 2 minutes. Bake for about 25 minutes or until the loaves sound slightly hollow when tapped on the bottom and the crust is a medium to dark brown. (If the crust is not brown enough, the loaves will soften as they cool). Transfer the bread to a rack to cool. Let rest at least 15 minutes before serving.
Questions & Replies

-
I really want to try this recipe. Sounds so good!
Reviews
-
 Have been searching for a recipe for a bread to rival an artisan bakery's....found it with this one. It's many steps but worth the effort, plus, if you don't feel like finishing the day you start, you can time-release these luscious loaves. I am not a skilled or experienced baker, so if I can do this, anyone can. I sprinkled coarse sea salt or kosher salt on the tops of the loaves before baking.
 -
 I've been making bread for decades so bear that in mind when I say that I found this recipe easy to make! It's very delicious!
 -
This is a wonderful, fragrant bread. It is very time consuming, so read the whole thing through and plot out your timing before you start. You will be rewarded with delicious chewy bread and a crisp crust. One bit of suggestion that I was going to give appears to already have been addressed -- when I printed out the recipe, the step-by-step instructions never mentioned that the sponge needed to be divided in half, and it was only briefly mentioned in the intro. Consequently, I forgot to divide it. Since I am not an artisan bread baker, I have no idea what would have been different had I made it the way the recipe (which has since been corrected, in step 4) now says to make it. What I do know is this -- my dough expanded during the last rising time but never really rose. It was too gooey to be able to slash. I followed the instructions (in my earlier version) exactly as they were written, step-by-step. I got 3 loaves that tasted almost like sourdough, but were rather flat and spread out. No problem, though, because I am not a stickler for appearances. We immediately gobbled up the first loaf (only waiting 14 minutes instead of the prescribed 30) and dipped it into herb/garlic-infused olive oil. That was my bite of heaven tonight, never mind that the recipe I made is substantially different that the recipe that is now here. I will have to try this again another time, and then I will follow the new directions. I will update this review if it needs updating at that point. Thanks, 2Bleu.
RECIPE SUBMITTED BY

2Bleu
Duncan, South Carolina
Original Zaaarite. Food lovers.
Lynnda passed away in March 2020. Her recipes live on here for everyone to enjoy and Rick continues the tradition. We will forever live together through our food. Live well. Eat well.?