PART OF Summer Grilling

9 Things You Need to Know Before Canning

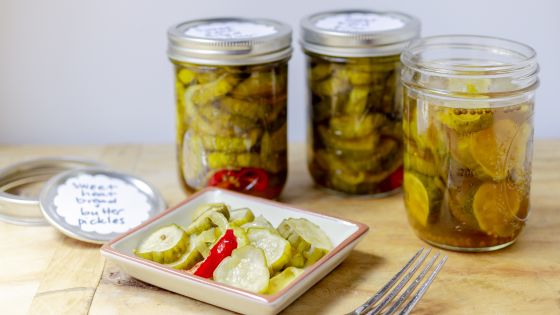
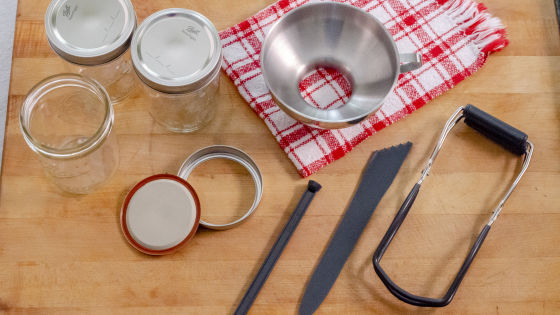
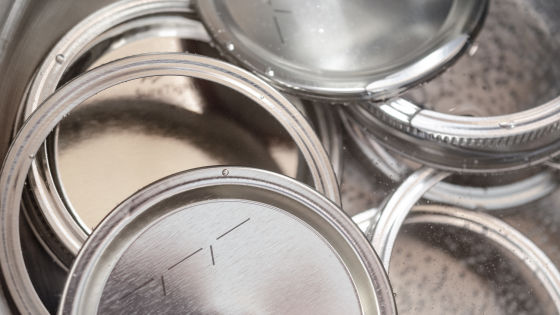
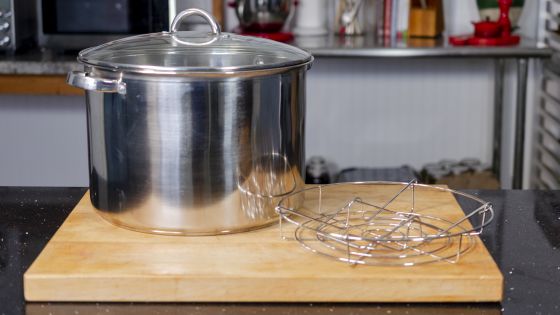
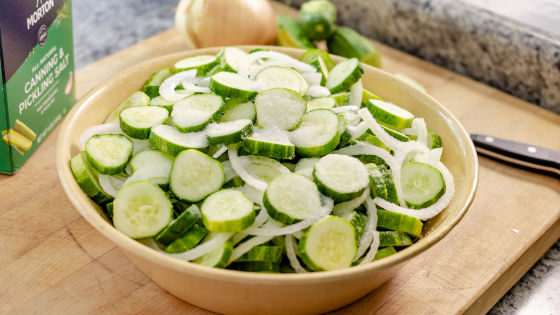
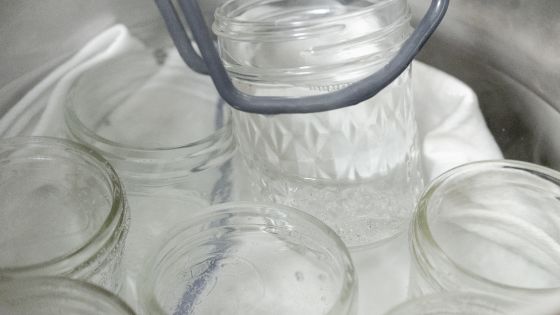
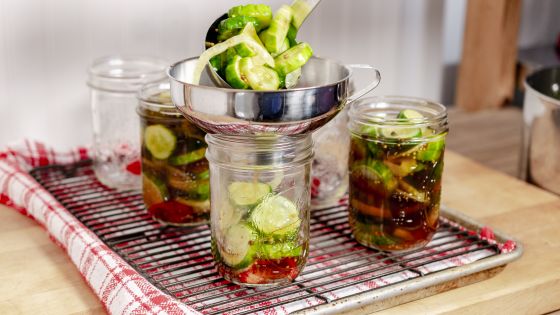
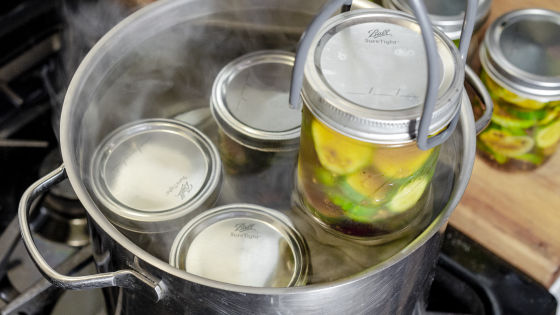
Not sure where to start with canning? Our tips make it easy to start preserving and pickling all of your fresh produce so you can enjoy it all year. From finding the right tools to properly processing and sealing your jars, we've got you covered with everything you need to know.

By Virginia Willis

Canning = Planning

• Choose your recipes, make a list, and assemble your equipment and supplies. Canning is not necessarily hard, but it is detailed and involved and requires a little organization.

• It’s important to choose your recipe from a reliable, trust-worthy source that follows USDA safety guidelines.

• Purchase or harvest the produce as close to the time of canning as possible.

• Follow the recipe; don’t make substitutions or changes.

• Allocate enough time to finish the project. · Assemble or purchase all your equipment and supplies ahead of time.

The Tools of the Trade

Specialized equipment and utensils for home canning make the canning process easier and safer.

Canning or Wide-Mouth Funnel: Pouring boiling sugar syrup or fruit into a two-inch opening can lead to messy disaster. Purchase a wide-mouth funnel to make it easier to aim and pour.

Jar Lifter / Canning Tongs: An odd tool with one purpose is not a common sight in my kitchen, but there’s a time and a place for a jar lifter! A jar lifter is a specialized set of tongs with a rubberized end that is specifically designed to lift the jars out of boiling water.

Get the Right Jars, Lids & Rings

Jars: There is a great variety of glass canning jars, sometimes called Mason jars, available in all shapes and sizes. Jars can washed and reused.

Lids & Rings: Home canning lids and rings are a two-piece vacuum cap. The lid consists of a flat metal disc with a sealing compound on the bottom and a threaded metal screw ring that fits over the rim of the jar. Do NOT boil the lids as this will deteriorate the sealing compound. Rings can be washed and reused, but lids should only be used once.

• Vintage lids, rings and jars—including old commercial jars from things like spaghetti sauce—should not be used as they may not work properly.

Get a Boiling-Water Canner

You will need a boiling-water canner, also known as a canning kettle. Boiling-water canning consists of a large pot, tall enough to fully submerge the canning jars with an inch or two of water over top. (If you don’t have a canner, you can simply use a deep pot.) The pot is used for both the sterilization of jars prior to filling, and also for boiling the jars once they are filled. High-acid foods are processed in the boiling water bath canner, ensuring the safety of the preserved produce by destroying harmful molds, yeasts and some bacteria. Foods with a pH level of 4.6 or lower—such as jams, pickles and sauerkraut—can be preserved by boiling-water canning. (Low-acid foods—such as meats—and non-brined or non-acidified vegetables—such as green beans, asparagus and beets—require a pressure cooker, which is a different type of canning not covered in this guide.)

When to Prepare Your Recipe

Once you have your equipment and ingredients assembled, read your recipe and make certain you understand the steps and process. If you are making jam, you can go straight from sterilizing the jars to making the jam to filling the jars. If brining your pickles first, wait until after the brining period is over, then sterilize the jars just before you're ready to cook the pickles. It’s all about timing. The main thing to remember from a food safety standpoint is hot food into hot (or nearly hot) jars.

Sterilize Jars & Prepare Lids

Place your clean canning jars on a rack in the bottom of the canning pot and add water to fill the jars and cover them by two inches. Cover the pot and bring the water to a rolling boil over high heat. After the water reaches a boil, boil them for 10 minutes, then reduce the heat and maintain at a simmer until you’re ready to fill the jars. Jars must be hot when food goes into them. Once you remove the jars you can reduce the heat to simmer and use the same water to prepare the lids and rings. The lids and rings should be placed in simmering, not boiling water as this may affect the rubberized ring on the bottom of the lid.

Pack Your Jars

Line a rimmed baking sheet with a clean towel or a rack. Remove jars from the simmering water using a jar lifter, and carefully pour the water in the jars back into the pot. Place the jars upside-down on the prepared baking sheet to air dry.

Pack any recipe-specified solid ingredients (such as herbs or cut vegetables for a pickle) into the hot jars. Ladle or pour the hot mixture or brine into the hot jars, using a widemouthed canning funnel to help keep the jar rims clean (if anything winds up on the rim, wipe it off with a dampened paper towel). Leave the recipe-specified amount of headspace, the space from the very top of the jar to the surface of the liquid or food inside. Repeat with remaining jars, working quickly to ensure that hot mixtures go into hot (or nearly hot) jars.

Process Your Jars

Place a lid and a ring onto each jar; screw just until fingertip-tight. Carefully lower the filled jars back into the pot of simmering water using the jar lifter to keep them upright. Add more water, if needed, to bring the water level to two inches above the jar tops. Cover the pot, increase the heat, and return the water to a full rolling boil. After the water reaches a boil, set a timer, and boil for the amount of time specified in the recipe, adjusting if needed for your altitude. Remove jars using the jar lifter, being careful to keep them upright.

Transfer jars to a towel-lined or wooden surface where they can rest undisturbed 12 to 24 hours. Do not tighten or adjust rings. Lids may make a popping noise as the jars cool. It is the sound of winning! That’s one sign of an airtight seal.

Check Seals, Label & Store

When the jars have cooled for 12 to 24 hours, remove the rings and inspect the lids. Each lid should be concave in the middle and firmly attached at the edges. Press down on the center of each lid with your finger. If the lid doesn’t move, the jar is sealed and can be stored in a cool, dark place for up to one year (once opened, store in the refrigerator up to one month). If the lid center depresses and pops up again, it means the jar isn’t sealed. Refrigerate immediately and use the contents within a week or so.

KEEP SCROLLING FOR NEXT STORY