Classic Pita Bread

"These are from "How to Cook Everything" from Mark Bittman.Most of the time is spent on the rise."
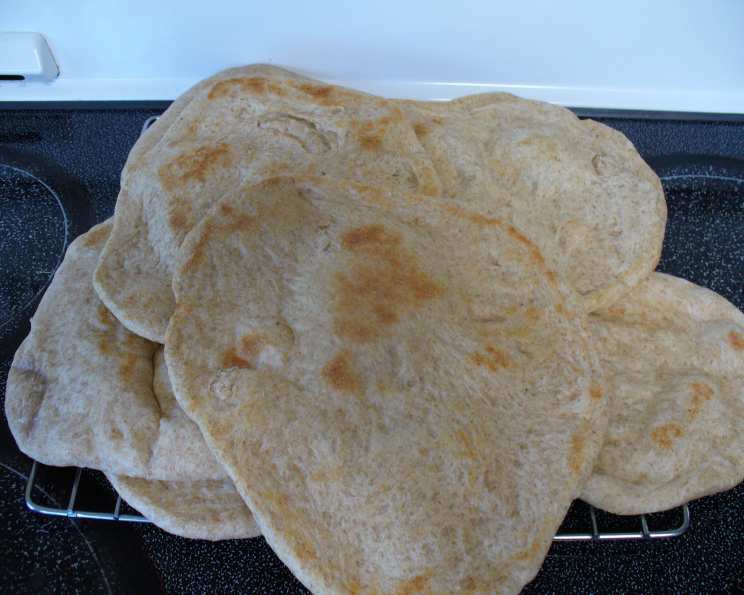

photo by IngridH


- Ready In:
- 3hrs
- Ingredients:
- 5
- Yields:
-
6-12 pitas
ingredients
- 3 1⁄2 cups all-purpose flour (you may also use a combination of the two, plus wheat flour) or 3 1/2 cups bread flour (you may also use a combination of the two, plus wheat flour)
- 2 teaspoons salt
- 1 1⁄2 teaspoons instant yeast
- 1 tablespoon olive oil, plus a bit for greasing the bowl
- 1 cup water, plus more as needed
directions
- Place flour in a food processor with steel blade. Add salt and yeast, process for 5 seconds.
- While processor is running, add olive oil and water through the feed tube.
- Process about 30 seconds and remove cover.
- Dough should be barely sticky and in a ball, add water 1 tablespoon at a time if too dry, and process for 5-10 seconds. If dough is too wet, add a tablespoon of flour and process for a couple of seconds.
- Place dough on lightly floured surface and and knead by hand for about 1 minute by hand.
- Lightly oil a large bowl and put the dough in it. Cover and let it rise until doubled, about 2 hours.
- Punch dough and divide it into 6-12 pieces. Keep lightly floured and covered.
- Preheat oven to 500°F, use baking stones, or place a baking sheet on each rack.
- Flatten each ball on a lightly floured surface and roll into a 6-8 inch circle. Lightly flour each circle as finished, cover, but do not stack.
- Starting with the first circles rolled, Place each circle on the sheet or stone and bake until lightly puffed (about 2-3 minutes).
- If bread does not puff up, still remove it at 2-3 minutes, creases in dough may cause it not to puff.
Questions & Replies

Got a question?
Share it with the community!
Reviews
-
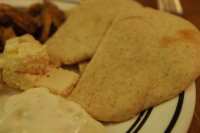
 Yum. I made these today, and my parents could not stop eating them! I loved how easy the dough was to put together- what is simpler than throwing all the ingredients into the food processor? It took a long time to rise, but that is a function of temperature, so not an issue with the recipe at all. I used 1 cup of WW flour and the remainder was bread flour. Great flavor, and very nice presentation. I cooked them on a baking stone, 3 at a time, for 2 1/2 minutes on the first side, then flipped and cooked for 30 seconds more to get a nice color on the other side. Great bread, we dipped in garlic lemon butter with dinner, but I will likely make a sandwich with one tomorrow. Made for ZWT6.
 -
 Great pita! All eaten up and none left. Made it early this morning, and had a delightful bite tonight. Love the use of olive oil, and was so very easy to put together. My food processor wasn't working...so I use the bread machine. Nice puffy pitas! Made for ZWT6 Zee Zesties! June 2010
 -
 I have never made a dough in my food processor before - it was so simple and easy to work with! I used 1 cup WW flour and the rest white. Awesome! For ZWT6 N.
 -
 This looks interesting!! Thanks!
RECIPE SUBMITTED BY

I joined Recipezaar to learn new recipes that are home cooked. I grew up having ready-meals like Encor and Stouffers and needed recipes that don't simply require opening a box and plopping in the oven! I enjoy cooking when I have the time to try new dishes. I make every recipe as written if I'm reviewing it to give a true review. If I make alterations that aren't in the directions, I don't feel it's a true reflection of the recipe; it's another recipe to me.
<img src="http://i23.photobucket.com/albums/b399/susied214/permanent%20collection/participantbannerzwt5.jpg" border="0" alt="Photobucket">
<img src="http://i23.photobucket.com/albums/b367/chefpaulag/final-1.jpg">
<img src="http://i23.photobucket.com/albums/b399/susied214/permanent%20collection/captain.jpg" border="0" alt="Photobucket">
<img src="http://www.recipezaar.com/members/home/329769/ninja%20bmp.jpg" width=75%>
(Zaar World Tour 4)
<img src="http://i23.photobucket.com/albums/b399/susied214/permanent%20collection/adoptedspring08.jpg">
<a href="http://s7.photobucket.com/albums/y254/Missymop/?action=view¤t=cunningcrocodiles.jpg" target="_blank"><img src="http://i7.photobucket.com/albums/y254/Missymop/cunningcrocodiles.jpg" border="0" alt="Photobucket"></a>
<img src="http://i26.photobucket.com/albums/c105/jewelies/DSC_0020.jpg">
(Australia/New Zealand Swap #15)