Community Pick
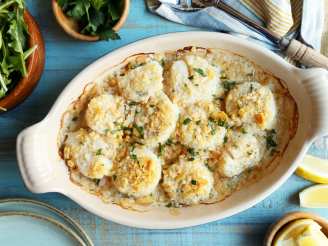
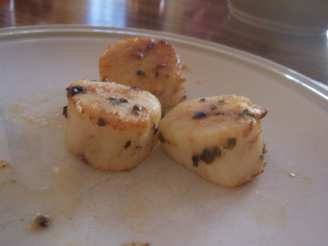
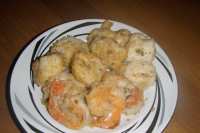
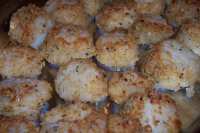
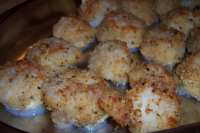
Parmesan Crusted Broiled Scallops

"Crusty scallops--excellent! From Cooking Light."
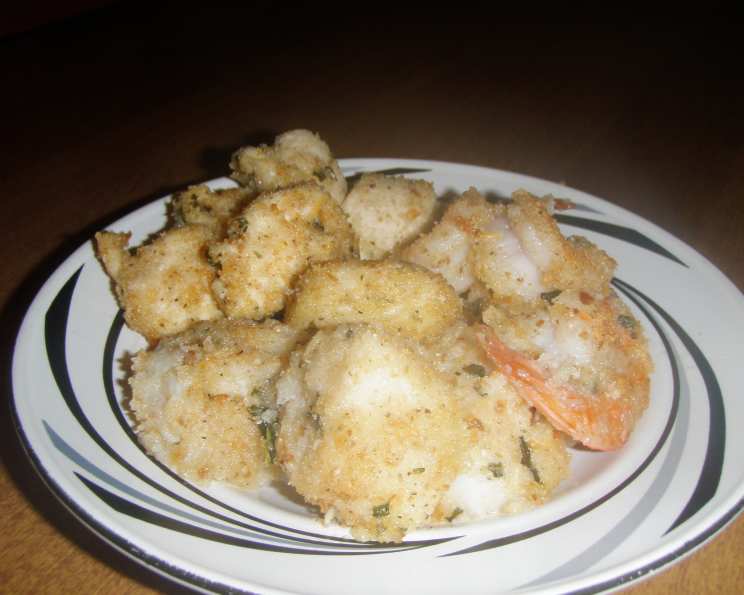
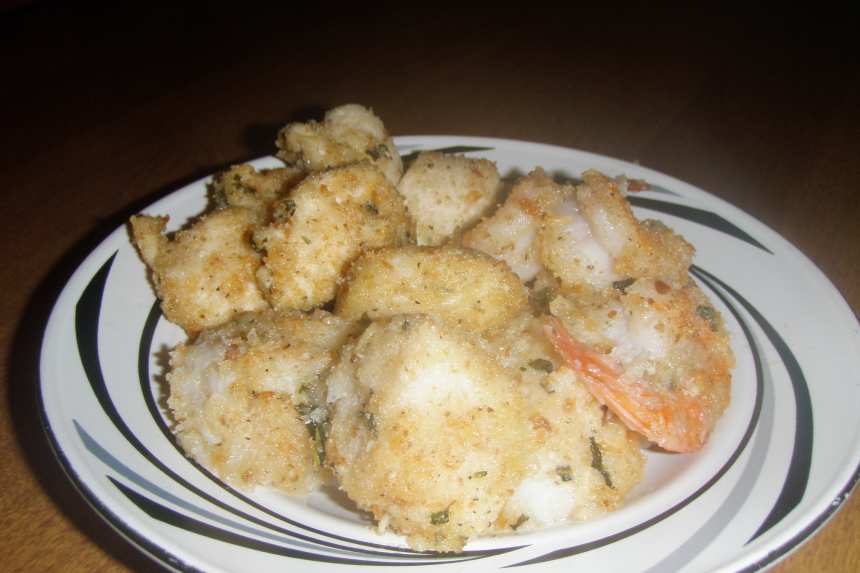
photo by Dawnab


- Ready In:
- 20mins
- Ingredients:
- 7
- Serves:
-
4
ingredients
- 1⁄3 cup finely crushed onion flavoured melba toast, about 9
- 1 tablespoon grated parmesan cheese
- 1 tablespoon minced fresh parsley
- 1⁄4 teaspoon paprika
- 1 1⁄2 lbs sea scallops
- 1 tablespoon butter, melted
- lemon wedge
directions
- Place the broiler pan on the second rack position to keep the scallops from burning.
- Combine the first 4 ingredients and 1/4 teaspoon black pepper in a large ziploc plastic bag.
- Brush scallops with butter.
- Add scallops to bag, seal and shake to coat.
- Place scallops on a broiler pan coated with cooking spray.
- Broil 10 minutes or until done.
- Serve with lemon wedges.
Questions & Replies

Got a question?
Share it with the community!
Reviews
-
 Great stuff! I gave all the scallops a healthy spritz of fresh lemon juice before doing anything else with them, I do that with almost all fish or seafood before cooking it, just a little quirk I have. We also used Italian seasoned breadcrumbs instead of the Melba toast. Other than that, the recipe was made as directed, and we thought it was quite scrumptious, even 3 year old La Princessa ate all of hers. Thanks! :)
 -
 Since my wife is not fond of scallops, I made this recipe with Shrimp ( large prawns ). They were fantastic!
 -
 I am on a low carb diet so instead of using melba toast I mixed 6 large pork rinds with 3 tbsp French's french fried onions. I pulsed them a few times in the food processor and used that as my breading. These scallops were so delicious. I served them over a nice spinach salad. Thank you!
 -
 Great simple recipe! I used some baked 'high fiber' wheat thins instead of melba and it was wonderful. Also used bay scallops so my cooking time was signifcantly less (6 1/2 minutes). On the broiler pan I put some brocoli that I had coated in veg oil, salt and pepper and it cooked right along w/ the scallops. I mixed eveything in a bowl instead of a plastic bag. Served on top of pasta. Yum and easy - thanks!
 -
 Very quick and easy to make, and a good basic starting point. We found this a little bland, but it would be easy to jazz it up with some more herbs, red pepper flakes or something like cayenne pepper. I don't have a broiler pan, so I did these on a cookie sheet. Unfortunately, that made the bottoms come out a little soggy. Next time I will put a rack on top of the cookie sheet and do them that way to keep 'em crispy. Also, don't put any extra breading on the sheet with your scallops, it'll burn! The breaded scallops turned golden, but any extra on my sheet turned black as can be. Thanks, I'll give these another try with a little more spice. Super easy!
see 31 more reviews
Tweaks
-
I am on a low carb diet so instead of using melba toast I mixed 6 large pork rinds with 3 tbsp French's french fried onions. I pulsed them a few times in the food processor and used that as my breading. These scallops were so delicious. I served them over a nice spinach salad. Thank you!
-
 This is a lovely way to fix sea scallops. I followed your directions, only using Italian seasoned breadcrumbs instead of the Melba toast. The scallps were broiled perfectly, while the breading was a lovely , crispy brown. I used olive oil spray for the pan. We all enjoyed this recipe very much. Thanks so much for another wonderful recipe.
 -
I used olive oil instead of butter, and while I'm sure the butter has better flavor, the olive oil was a good substitute. I too chose to coat the scallops in a plastic bag for ease of preparation. The result is succulant scallops with a nice crusty coating. Thank you Derf for sharing the recipe.
RECIPE SUBMITTED BY

<p>November 4th, 2013: Our community lost a wonderful friend when Dorothy passed away on October 24th, 2013. We are shocked and saddened by her passing and there is a thread for expressing your condolences.</p>
<p>Mary at Food.com</p>
<p><a href=http://www.food.com/bb/viewtopic.zsp?t=398284>http://www.food.com/bb/viewtopic.zsp?t=398284</a></p>
<p> </p>
<p>********************************************************************</p>
<p>I live in the sunny okanogan valley - I am a retired Resort Services Director, love collecting receipes and cooking but am a diabetic so some times i can only collect </p>
<p>Love traveling, own a timeshare, went to Portugal in the year 2000, this picture was taken there, so it's 9 years old, but the only decent one I have, I am not photogenic and hate having my picture taken!! <br />I've been enjoying lushious recipes from 'zaar for 9 years now, since January 2001. <br /><img src=http://i3.photobucket.com/albums/y53/DUCHESS13/Animation1.gif alt=Image hosted by Photobucket.com /> <img src=http://i3.photobucket.com/albums/y53/DUCHESS13/berriesblinkie.gif alt=Image hosted by Photobucket.com /><img src=http://i3.photobucket.com/albums/y53/DUCHESS13/4treasurehunt.gif alt=Image hosted by Photobucket.com /> <br /><img src=http://i23.photobucket.com/albums/b399/susied214/purplechefhat.gif alt=Image hosted by Photobucket.com /><img src=http://i23.photobucket.com/albums/b399/susied214/projects/chef3.jpg alt=Image hosted by Photobucket.com /> <br /><br /><img src=http://i23.photobucket.com/albums/b399/susied214/projects/FinishedJollyRoger_1.jpg border=0 alt=Image hosting by Photobucket.com /><img src=http://i23.photobucket.com/albums/b399/susied214/projects/dragonspearls_1.jpg border=0 alt=Image hosting by Photobucket /><img src=http://i3.photobucket.com/albums/y53/DUCHESS13/FFF/completedbanner.gif alt= /> <br /><img src=http://i23.photobucket.com/albums/b399/susied214/permanent%20collection/untitled.jpg border=0 alt=Photobucket - Video and Image Hosting /> <img src=http://i23.photobucket.com/albums/b399/susied214/permanent%20collection/200_artistrichardneuman-art-prints_.jpg border=0 alt=Photobucket - Video and Image Hosting /><img src=http://i23.photobucket.com/albums/b399/susied214/projects/pacbanner.jpg border=0 alt=Photo Sharing and Video Hosting at Photobucket /><img src=http://i23.photobucket.com/albums/b399/susied214/projects/200_PACpic.jpg border=0 alt=Photo Sharing and Video Hosting at Photobucket /><img src=http://i21.photobucket.com/albums/b280/carolinamoon21/TasteofYellow.jpg alt= /><img src=http://i21.photobucket.com/albums/b280/carolinamoon21/Octoberevent.jpg alt= /><img src=http://www.recipezaar.com/members/home/1535/cheesesticker.jpg alt= /><img src=http://i21.photobucket.com/albums/b280/carolinamoon21/personal/FRENCH-foodfun.jpg alt= /><img src=http://i21.photobucket.com/albums/b280/carolinamoon21/EditBeforeandAfterSTICKER.jpg alt= /><img src=http://i42.photobucket.com/albums/e347/Saturn6666/Banners/Photo_Video_577111733_orig.jpg alt= /><img src=http://img.villagephotos.com/p/2003-11/484938/Spelling-Bee-stick2jpg.jpg alt= /><img src=http://www.recipezaar.com/members/home/1956/holidaylightssticker.jpg alt= /><img src=http://img.photobucket.com/albums/v204/derf16/food%20photography%20series/Comfortstickercopysmall.jpg alt= /><img src=http://i21.photobucket.com/albums/b280/carolinamoon21/Ingredients/Other/photo-swap-7sticky.jpg alt= /><img src=http://img.photobucket.com/albums/v204/derf16/food%20photography%20series/MuffinLovesticker.jpg alt= /><img src=http://www.recipezaar.com/members/home/1956/L%5B1%5D.F-stickJPEG.jpg alt= /><img src=http://img.villagephotos.com/p/2003-11/484938/MayFlowerssticker.jpg alt= /><img src=http://i21.photobucket.com/albums/b280/carolinamoon21/Ingredients/TasteofYellowSTICKER.jpg alt= /><img src=http://i21.photobucket.com/albums/b280/carolinamoon21/Ingredients/BBQlSTKR.jpg alt= /><img src=http://i21.photobucket.com/albums/b280/carolinamoon21/Ingredients/CobblerPieTartSTICKER.jpg alt= /><img src=http://i21.photobucket.com/albums/b280/carolinamoon21/Ingredients/CROCKPOTSTKR.jpg alt= /><img src=http://i21.photobucket.com/albums/b280/carolinamoon21/Ingredients/FISHSEAFDSTICKER.jpg alt= /> <br /><br /><img src=http://i80.photobucket.com/albums/j166/ZaarNicksMom/CookingSchoolHost1.jpg border=0 alt=Photobucket /><img src=http://i21.photobucket.com/albums/b280/carolinamoon21/Ingredients/Other/BeyondburgersST.jpg alt= /><img src=http://i21.photobucket.com/albums/b280/carolinamoon21/Ingredients/Other/Elves-appreciationSTICKER.jpg alt= /></p>