Editors' Pick
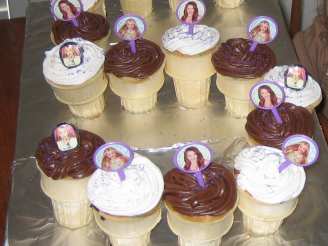
Ice Cream Cone Cupcakes

"This is an excellent treat for the kids; sure to bring a smile to their faces!"
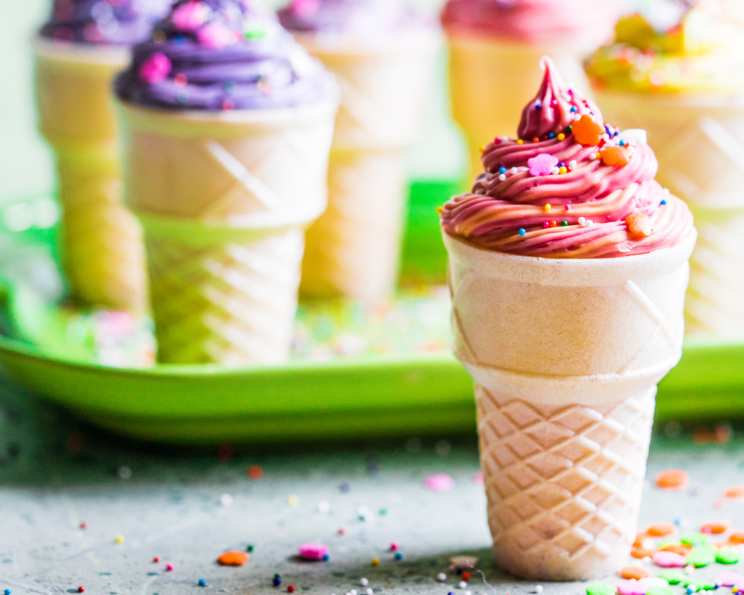
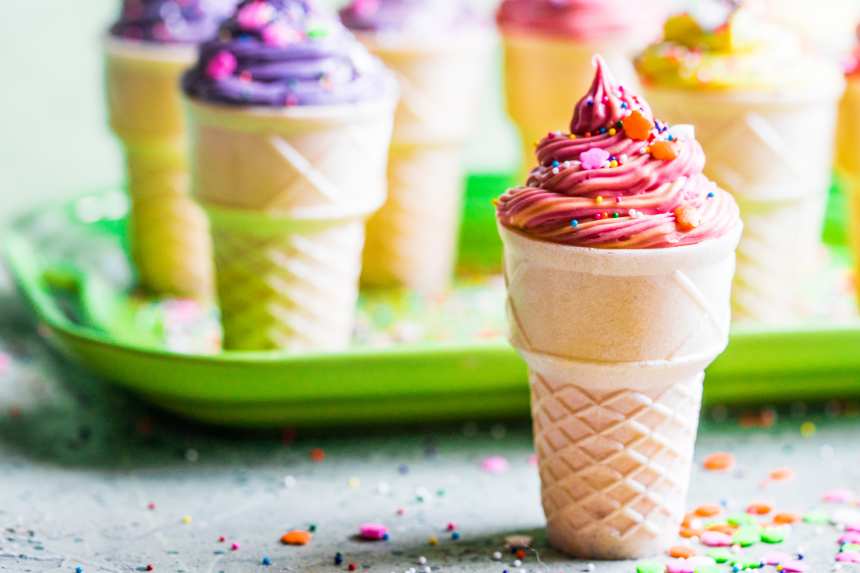
photo by alenafoodphoto


- Ready In:
- 38mins
- Ingredients:
- 4
- Serves:
-
24
ingredients
- 1 (18 ounce) cake mix, any type (plus ingredients required on the box)
- 24 flat-bottomed ice cream cones
- 1 (16 ounce) can frosting (or homemade if preferred)
- candy sprinkles (or cake decorations)
directions
- Heat oven to 400°F.
- Prepare batter for cupcakes per instructions on the box.
- Pour scant 1/4-cup batter into flat-bottomed ice cream cones so they are a little less than half full, or about half full; if you fill the cones too much, the cakes will not have a nice, round top.
- Place the cones on a baking sheet and bake for 15 to 18 minutes.
- Cool and frost, then decorate with sprinkles as desired.
Questions & Replies

-
 Hi! I saw this recipe and set out to the store to get the ingredients right away! I was just wondering what icing recipe would you recommend? Thanks!
Reviews
-
 Too cute!! I've read many reviews and many recipes and found a couple of tricks that really work. Mini chocolate chips in the bottom of the cone help keep them from being too top heavy (plus makes for a sweet surprise at the bottom of the cone!). To bake I put a double layer of heavy duty foil over the top of a 9x13 cake pan and poked holes for the cones. I poked a fork in each towards the bottom after baking and didn't have any problem with chewy cones. And to transport I did the double layer of heavy duty foil in a disposable 9x13 foil pan with a lid. Didn't loose a single one in transport! This was a super easy and totally adorable treat for young and old alike! I will definitely make them again! Thanks for the recipe!
 -
 Very cute recipe. I have been wanting to make this recipe for a few years now. I used alot of the reviewers suggestions like this... I baked at 350 degress, I filled about 1/2, I wrapped the cones in foil so they wouldnt burn, and after they baked I poked the bottom of each cone so they wouldnt get soggy, thanks for all the suggestions they would like a charm, and thanks for the recipe.
 -
 To be honest with you, I can't rate these by taste- I made these for my young niece and her litte brother- but by looks, they were a 10++! I had a little problem with getting the batter to rise on its own out of the ice cream cone. Luckily, I only made 6 of these, and had made the rest into cupcakes. I ended up slicing off the top half of the cupcake, melting a wee bit of chocolate, and 'gluing' it onto the cone-cupcake with that. It worked perfectly. I also put the icing I was using into a sandwich bag, snipped off the end and piped it 'round the cupcake so that it had a perfect soft-serve look to it. I used colorful candy sprinkles, and finished with a maraschino cherry. Okay, so I'm outta the loop 'cause I don't have kids, but these are just the most adorable little things! Thanks for making somebody's birthday very, very special, Lennie!
 -
I used "Betty Crocker Super Moist White Cake", and regular (4.5g) ice cream cake cups, filled more like 2/3 full, baked in 350F for about 20-22 minutes. Made 24 cupcakes. I used a mini muffins (24) pan, lined every other cup with a mini muffins paper. Because of the paper, the ice cream cake cups fits snug and stood up perfectly! If you have 2 of those mini muffin pans, you should be able to bake just one batch. I also used the trick of poking a hole at the bottom to cool. For transporting, I was able to fit all 24 back in the mini muffin pan that lined with the paper I used earlier. I didn't ice the cakes; instead, I brought a can of whipped cream, and topped it off as I was handing out the cakes!
-
 Reading the reviews for the ice-cream cone cupcakes gave me an idea for transportation of them. I was desperate for something so I took a empty cereal box taped ends. With a shot glass, trace circles on one side of the box. Make sure that you put 1 to 2 fingers width inbetween each circle. Then cut out circles with a utility knife. You should get about 9 circles on a 18oz box. Then place decorated cones in holes. Yea, easily transportation to go.
see 45 more reviews
RECIPE SUBMITTED BY

I have been sharing recipes here at Recipezaar since October 2001. You won't see me around anymore, although if you're an old-school Zaarite you'll remember that in the past, you couldn't shut me up!