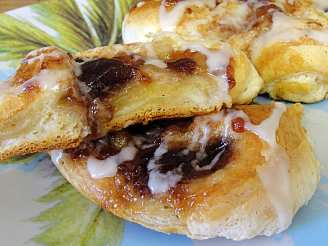
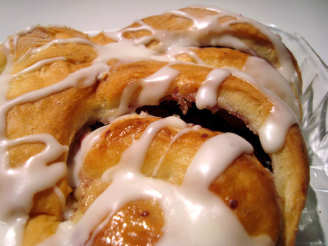
Homemade Cheese Danish

"Found this recipe on a recipe/food blog and wanted to put it here for safekeeping. Have made once and they were pretty good. The recipe is from The Art & Soul of Baking and uses a 1/2 recipe of Danish dough which makes 12 good size pastries. It turns out that Danish dough is just croissant dough with the addition of eggs. And that you make Danish dough using the same technique you make croissant dough–rolling it out and folding it three times, keeping it super cold, etc. With the addition of the eggs, the dough is a bit stickier. Rolling it out was easier because apparently the eggs coat the gluten strands so there isn’t as much “spring”.
You can freeze unbaked shaped Danish for 4 to 6 weeks. Let defrost and proof at room temperature for about 2 to 3 hours. You can also freeze baked Danish for up to one month. Thaw at room temperature for 30 minutes, then reheat in 350° F oven for 7 to 8 minutes, until crust is crisped and the center is warmed through."


- Ready In:
- 6hrs 16mins
- Ingredients:
- 19
- Yields:
-
12 danish
ingredients
-
Dough Block
- 1⁄2 cup warm whole milk (110 to 115 F)
- 1 teaspoon sugar
- 2 tablespoons sugar
- 4 teaspoons active dry yeast or 1 tablespoon instant yeast
- 2 cold large eggs
- 3⁄4 cup cold whole milk
- 3 1⁄2 cups unbleached all-purpose flour
- 1 teaspoon salt
- 1⁄2 teaspoon ground cardamom
-
Butter Block (Beurrage)
- 1 1⁄2 cups cold unsalted butter, cut into 1/2 inch pieces
- 1⁄4 cup unbleached all-purpose flour
-
Cream Cheese Filling
- 8 ounces cream cheese, cut into 8 to 10 pieces
- 6 tablespoons sugar
- 1 large egg yolk
- 1 1⁄2 tablespoons unbleached all-purpose flour
- grated lemon zest from approx half of a lemon
- 1⁄2 teaspoon pure vanilla extract
-
Apricot Glaze
- 1⁄4 cup apricot jam
- 2 -3 tablespoons water
directions
- Make the dough block: Whisk warm milk and teaspoon of sugar in small bowl. Add yeast and whisk. Let sit until mixture is bubbly and yeast is activated, about 10 minutes.
- In stand mixer bowl, whisk remaining sugar, cold milk, and eggs. Whisk in yeast mixture. In separate bowl, whisk flour, salt, & cardamom until well-blended. Add flour mixture to egg mixture, attach dough hook, and mix on low speed for 1 to 2 minutes or until liquid is absorbed and a rough mass has formed. {Note: for both croissant dough and Danish dough, you only want to knead the bare minimum to bring the dough together. You want to keep gluten formation to a minimum, which makes rolling the dough easier. It will get plenty of kneading during the rollouts/turns}. Turn dough out on a floured surface. Knead the dough 3 to 5 times to bring it together. The dough is very sticky. Don’t be afraid to flour and/or wet your hands. The dough will not be smooth or elastic. Wrap the dough in plastic and refrigerate for 30 to 60 minutes.
- Make the butter block: Toss the butter with flour and chill in refrigerator for 20 minutes. In cleaned stand mixer with paddle attachment, beat chilled butter on medium speed, scraping down sides as necessary, for 1 to 2 minutes or until butter and flour form a smooth mass. Scrape butter onto a piece of parchment paper, wrap it up and refrigerate while you roll out dough.
- Incorporate the butter and turn the dough: Dust surface with flour. Set dough in center and dust the top with flour. Roll dough into a 15 by 12-inch rectangle with short side parallel to the edge of your work surface. Make it as straight as possible. Stretch and pull corners if necessary to make nice sharp corners. Visually divide the dough into thirds. Using your fingers (butter is too cold for spatula) spread the cold butter over the top of the upper 2/3rds of dough, leaving a 1/2-inch border on edges.
- Use a letter fold to encase the butter: Fold the empty bottom third over the middle third of the dough. Then fold the top third down over the center. Pinch together the seams at the bottom and sides of dough and gently roll your rolling pin over the top 3 or four times to help seal the seams. You’ve just completed your first “turn”. If the butter has become warm and squishy, refrigerate the dough for an hour. If not, move on to the second turn.
- Dust work surface with flour. Position the dough with short side parallel to your work surface and the long fold to your left. Dust the dough with flour and roll it into a 20 by 12-inch rectangle. Brush any flour from the surface of the dough. Fold the dough using the book fold method: Fold the two short edges to the center of the dough, leaving a 1/4-inch gap. Line up edges precisely and square corners as you fold. Fold one side over the other as if you are closing a book. Briefly roll your rolling pin across the top to seal the seams. This completes the second turn. Wrap in plastic and refrigerate for an hour.
- Dust work surface with flour. Remove dough from refrigerator, dust with flour, and roll into a 20 by 12-inch rectangle. Brush any flour from work surface and fold dough using letter-fold method from step #5. Make sure to square the corners and fold neatly and precisely as possible. Roll your rolling pin over the top to help seal the seams. This completes the third turn and the Danish dough is finished.
- Wrap dough in plastic wrap and refrigerate for at least 2 hours or up to 24 hours before using it. You can also wrap it up and freeze for 4 to 6 weeks. Thaw in refrigerator overnight before using.
- Make Cream Cheese Filling - Place cream cheese and sugar in bowl of food processor. Process until mixture is smooth, 20 to 30 seconds, scraping down sides half-way through. Add egg yolk and pulse for 5 seconds and scrape down sides. Add flour, zest, and vanilla extract and blend well–about 10 seconds. Scrape bowl and make sure everything is well-mixed.
- Make Apricot Glaze - Combine jam and 2 tablespoons of water in a small saucepan. Warm over low heat until melted and fluid. If glaze seems too thick, add third tablespoon of water. Strain through fine-mesh strainer into small bowl to remove any chunks of fruit. Use while warm and fluid. The glaze will keep in refrigerator for one month. Reheat before using.
- Make Danish - Dust work surface with flour. Place dough in center and dust top with flour. Roll into a 16 by 12 by 1/4-inch rectangle. Mark dough at 4-inch intervals on all sides. Cut dough into 12 (4-inch) squares.
- Place a tablespoon of Cream Cheese Filling in center of each square and smear in a slight oval toward two of the diagonal corners. Fold one of the other corners over filling. Moisten its top with a bit of water and fold the opposite corner over the top and press to seal. Line 2 baking sheets with parchment paper or silicone mats and place Danishes on prepared sheets.
- Loosely cover sheets with plastic wrap and let Danish rise in a cool room-temperature spot until they are doubled in size and look like they have taken a deep breath (about 1 hour). If you squeeze one, it should feel marshmallow-like.
- Preheat the oven to 400° F and position rack to center. Chill Danish in freezer for 10 minutes or refrigerator for 15 minutes. Bake one sheet of Danish at a time, rotating sheet halfway through, for 14 to 16 minutes. The Danish should be golden brown. Transfer Danish to cooling rack and immediately brush with a thin layer of Apricot Glaze. Bake and glaze the 2nd Danish sheet the same way. Cool completely and dust with confectioners’ sugar prior to serving.
Questions & Replies

Got a question?
Share it with the community!
Reviews
Have any thoughts about this recipe?
Share it with the community!
RECIPE SUBMITTED BY

-Mary-
Marshfield, Missouri