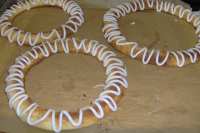
Danish Wedding Tower (Kransekage)

"Traditional wedding cake made with Odense marzipan or almond paste.
For Birthday parties or other big gatherings, it is shaped as a cornucopia, and filled with chocolate. Contact me for further information. Make it early, and freeze without the icing before assembly, it gets even better that way. The bride and groom, gets the top ring, and the bridal figurine, and share it, then guest break pieces of, as it is passed from coffee-table to coffee-table. Prep time does not include resting time or icing or decorating time."
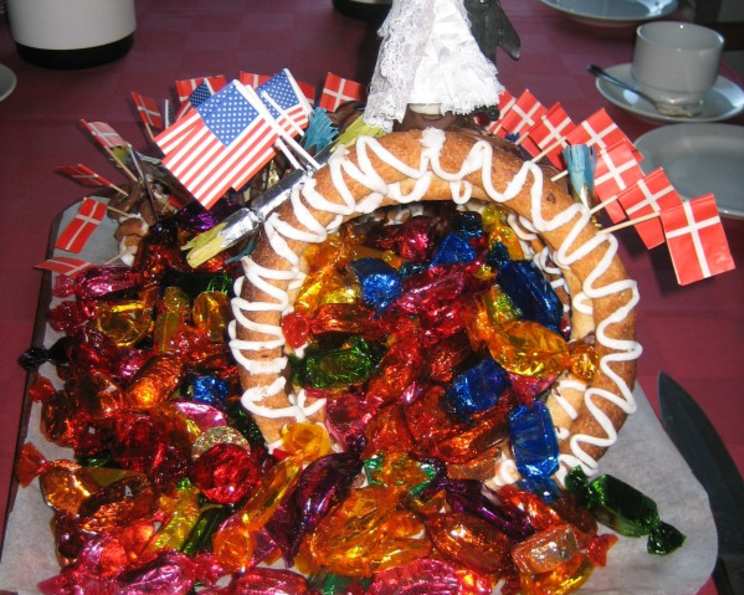
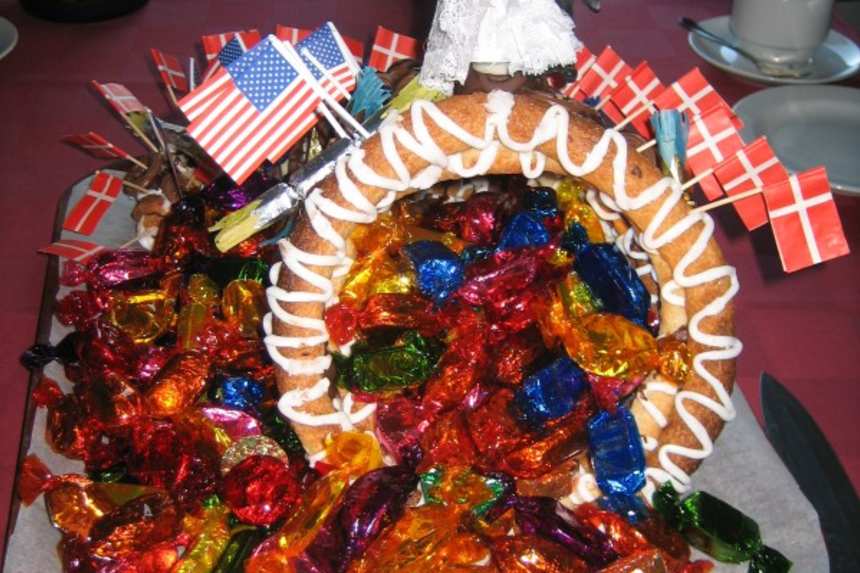
photo by Benthe Danish


- Ready In:
- 1hr 15mins
- Ingredients:
- 7
- Yields:
-
1 tower
- Serves:
- 8
ingredients
- 14 ounces marzipan, Odense 400 g or 14 ounces almond paste, 400 g
- 300 ml sugar, 180 g
- 1 1⁄2 pasteurized liquid egg-whites, 80 g
-
Icing
- 500 ml powdered sugar, 250 g
- 1 pasteurized liquid egg-whites
- 1 tablespoon vinegar
-
Decoration
- 12 ounces bittersweet chocolate or 12 ounces semi-sweet chocolate chips
directions
- Box of 25 flags on little sticks (1-1½ inch size).
- Platter size paper dollies.
- Using a stand mixer combine marzipan, sugar till it has formed on large ball. Add egg whites little by little.
- Test dough by rolling a small cigar-size ball and form as a ring, if the dough does not crack, you have enough egg white inches.
- The dough will be very dense and sticky.
- Place in refrigerator for at least 3-4 hours, or even better over night.
- Pre-heat oven at 400 degrees F or 200°C.
- Divide dough into 8 pieces or by weight
- 1 10g, 2 20g, 3 30g 4 40g etc.
- Rolling each into finger thick sticks.
- Making the first piece into 3.5 inches,
- Then the next into 5, inches,
- Then the next into 6.5, adding 1.5 inch in length for each piece.
- Make at least 8 pieces.
- Shape them into rings.
- Joining the ends with a little egg white or water.
- Press gently to pitch the middle of the ring a little, like roof tops pointing upwards.
- Place on floured or parchment papered baking sheets.
- Tip: I draw circles on the parchment papers back with a compass, and then place the rings on top side, where I can still see the circles, to make them as even a possible.
- Bake for 8-10 minutes till they are light brown on top.
- Leave to cool off completely, then.
- If freezing, wrap in freezer bags and place in freezer for up till 3 months.
- Defrost the day before intended use.
- Decorations:.
- Draw 24 small hearts, and 24 small wedding circles, or butterflies or other theme items (max. 1 inch in diameter) on the back of parchment paper with a medium to large marker.
- Turn paper over and.
- Melt chocolate in the micro-oven or in a double boiler.
- Fill into a decorator bag with a small fitting.
- Trace chosen patterns with the warm chocolate and let cool completely. Save a little chocolate for attaching the
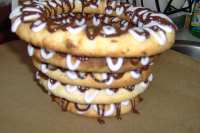
- Icing:.
- Do icing several hours before you plan to assemble the tower.
- Combine powdered sugar and egg whites for the icing, and fill into a decorator bag or a Ziploc bag, using a very small whole to make a criss-cross pattern from outside edge to inside edge and back again,
- Start with the largest ring, creating the zigzag pattern continue in unbroken pattern all the way around the ring.
- hen do the next biggest ring, and while icing is still wet on the biggest one, place the slightly smaller ring on top. Icing will bind them together.
- Then keep going till you have a small tower.
- Icing takes about 40-60 minutes to harden.
- Melt 2/3 of the chocolate
- Pour into zip lock bag, and carefully cut the one corner, so a very small stream of chocolate comes out at the time.
- Make your chocolate designs on parchment paper or buy plain chocolate rings.
- Place one dollies on a serving platter.
- Place the largest ring on the dollies
- Place 3 small globs of chocolate on the bottom ring.
- Carefully place next biggest ring on top, and place 3 globs of chocolate on it.
- Placing the next biggest ring on top, continue till you have a tower.
- Heat the last chocolate.
- And place a small glob of chocolate on the bottom ring on the side.
- Attach chocolate designs (wedding rings or what you desire) by pressing gently into chocolate globs and holding for a second.
- Move up the rings placing your chocolate designs up the tower.
- Attach flags in between chocolate designs.
- And a bridal figure on top.
- Your wedding tower is ready.
- Enjoy.
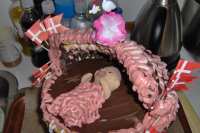
- Reverse the tower and make a bassinet for a baby shower. See additional pictures.
Questions & Replies

Got a question?
Share it with the community!
Reviews
Have any thoughts about this recipe?
Share it with the community!
RECIPE SUBMITTED BY

My beloved sister Lise passed away on December 3 2008, so this year I didn't do all my usual Christmas cooking and baking.
Frank and I moved to a bigger apartment on January 1, and once I can see the floor for boxes, I will get back to cooking. I look forward to re-visit with my wonderful Zaar friends again.
I have not been much on Zaar last summer and Fall, due to my sister, and father's illness. We have now come to the hard part, they have stopped all treatment on Lise, and we can only try to be there for her, her family and each other. Then England seems such a long way away from Denmark.
Grown and multicultural woman with a passion for cooking and especially learning about others holidays, traditions and recipes. I have lived 18 years in the USA and have grown children there so I do go there regular. Am an accomplished mural painter and collector of Japanese art and furniture.
My DBF say I am addicted to Zaar, he is probably right, apart from having to look of idears for dinner, or lunch or snacks or chocolade dressed up as something else, I also have to check out my wonderful cooking partners in crime, and very very funny friends at Zaar. I have learned so much from you all.
<a href="http://s19.photobucket.com/albums/b161/tisht/?action=view¤t=tish2.jpg" target="_blank"><img src="http://i19.photobucket.com/albums/b161/tisht/tish2.jpg" border="0" alt="Recipezaar Challenge 2008"></a>
<img src="http://i23.photobucket.com/albums/b399/susied214/permanent%20collection/adoptedspring08.jpg" border="0" alt="Photobucket">
<img src="http://i232.photobucket.com/albums/ee177/pelysma/banner002_200.jpg">
<img src="http://i3.photobucket.com/albums/y53/DUCHESS13/Zaar%20World%20Tour%204/ZWTAB-tg.gif">
<img src="http://i3.photobucket.com/albums/y53/DUCHESS13/homepage/ZWT4-TeamCaptain.gif">
<img src="http://i195.photobucket.com/albums/z205/jubespage/stacky5.jpg">


