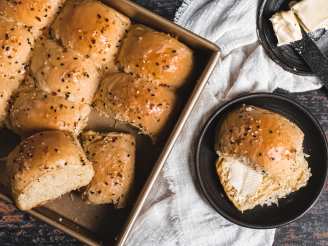
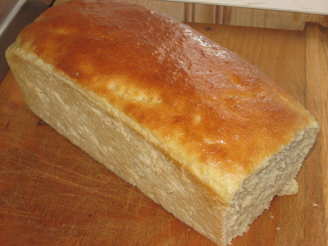
Country White Bread

"I have just discovered a cookbook called "The I Love to Cook Book" by Lauren Groveman. The recipes I have tried are incredible so far. This is her recipe for white bread. It is so good! The family wants me to make it all the time now (we will see.) My daughter said that bread tasted like a croissant on the inside. We were all in heaven! I made it again yesterday. It is a bit time consuming, but it is due to having 3 rises, but the author gives a great tip for making it ahead of time. It's an easy dough to work with and she gives a great method for shaping the loaves. I have changed the recipe directions a bit to meet my needs and it works well! I have a regular kitchen aid mixer and I put as much flour as I can in it (about 8 cups) and then add the rest right into dough on the floured surface. It makes 3 large loaves. Use a electric carving knife for nice straight slices of bread. *For some reason the website won't take the correct the time for prep and cooking. It takes about 5 hours of prep (most of that rising) and 30-35 baking."


- Ready In:
- 5hrs 35mins
- Ingredients:
- 12
- Yields:
-
3 loaves
ingredients
- 6 tablespoons unsalted butter
- 2 1⁄2 cups milk
- 1⁄4 cup vegetable shortening
- 2 1⁄2 teaspoons salt
- 1⁄2 cup sugar or 1/2 cup honey, plus
- 1 pinch sugar
- 2 (1/4 ounce) packages active dry yeast
- 1⁄2 cup warm water
- 3 extra large eggs, at room temperature
- 3 extra-large egg yolks, at room temperature
- 5 cups bread flour
- 5 cups unbleached all-purpose flour
directions
- Crack the 3 large eggs in one bowl and then put the other 3 egg yolks in another bowl (my way of coming to room temp quickly). Spray a large 8 quart bowl with vegetable spray. Set bowl aside.
- Warm the milk with shortening and the butter in small saucepan. Pour the hot milk mixture into a large bowl (kitchen aid bowl) and add the salt and ½ cups sugar or honey. Let the mixture cool to lukewarm.
- In a small bowl, dissolve the yeast in the warm water with a pinch of sugar and allow it to become bubbly, about 3 minutes. Meanwhile, stir the whole eggs and egg yolks into the milk mixture, then add the dissolved yeast.
- Stir in the bread flour, 1 ½ cups at a time, then add the all-purpose flour, to create a somewhat stiff and shaggy mass that is no longer easier stirred.
- Use a sturdy rubber spatula to scrape the mass out onto a floured surface and knead it until you’ve created a dough that’s smooth and elastic, adding only as much additional flour as needed to keep the dough from sticking.
- Place the dough in the greased bowl and spray the top lightly with vegetable spray. Cover the bowl with greased plastic and a kitchen clean towel. Let the dough rise in a warm draft free spot for 2 hours.
- Uncover the dough and punch it down with several swift swats with the back of your hand. Turn the dough over in the bowl and knead it gently to redistribute the yeast, Re-cover the bowl and let the dough rise again until very light and billowy, 1 ¼ hours.
- To shape, rise and bake the loaves, first spray three 9 x 5 inch loaf pans and set them aside.
- Turn the risen dough out onto a lightly floured surface and knead it gently and briefly. Using a pastry scraper, divide the dough into 3 equal portions and cover them while working with one at a time.
- Toll one piece into a 8 x 10 inch rectangle, with one short end close to you. Starting at the short end that is farthest from you, roll the dough snugly toward you. After each revolution, use the fingertips on your working hand to press down and connect the interior wall of the roll to the bottom of the dough. When you reach the bottom, pinch the last inch of dough onto the roll so it adheres. Working with one end at a time, press each coiled spiral of dough in towards the center of the of the log. Pinch the top and bottom outer rims of dough together, elongating this part slightly, and attach it to the bottom seam, rounding off and sealing each end.
- Lay the loaf seam side down in a prepared loaf pan and use your hands to gently plump and correct shape. Cover the loaf with a clean kitchen towel and repeat this procedure with the remaining dough. Let the dough rise for 45 minutes in a draft free spot.
- Twenty minutes before the end of the rise, preheat oven to 400 if using metal pans, 375 if using glass. Just before placing the loaves in the ovens, brush the tops with melted butter. Bake the loaves in the middle of the oven, with 1 ½ inches between them, for 30 to 35 minutes, covering loosely with aluminum foil for the last 10 minutes.
- Remove the loaves from the oven and turn them out of their pans onto wire racks. Give the bottom of each loaf a good tap on the bottom, which should sound hollow. If not, put them back into the oven (on a shallow baking sheet) for a few more minutes.
- When done, remove the loaves from the oven and, for the softest crust, brush the tops with more melted butter. Let the loaves cool on wire racks before slicing.
- *The dough can be made two days ahead of baking. After the first punch down, cover the bowl securely with the original greased plastic wrap and then with aluminum foil. Before shaping, let the dough sit out of refrigeration until it comes to room temperature (which can take 4 hours). Shape, rise and bake as directed.
- *To freeze these loaves, don’t apply the last application of butter after baking, which tends to create a shriveled look in frozen breads. When fully cool, warp the loaf in a double layer of aluminum foil, then slip the loaf inside a large heavy duty freezer bag and freeze up to one month.
Questions & Replies

Got a question?
Share it with the community!
Reviews
-
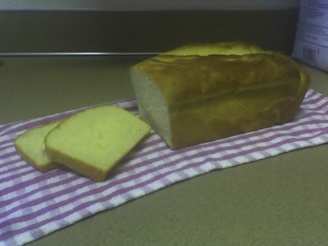
 I doubled this recipe as my family loves bread and I was also able to share it with one of my real estate clients who was closing on their home the next day. The texture was fine and the golden color reminded me of an egg bread my mother use to buy when I was a little girl at the local bakery. I highly recommend this bread to anyone who loves a fine textured golden white bread. However, it is not a quick bread to make as it takes all day to rise. I start about 7 or 8 a.m. and it finally comes out of the oven around 4 p.m., depending on weather conditions. So plan on being home most of the day.
RECIPE SUBMITTED BY

lisar
Provo, Utah