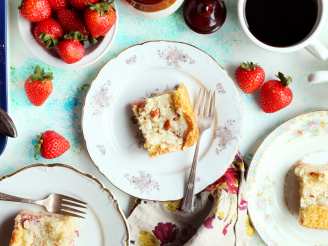
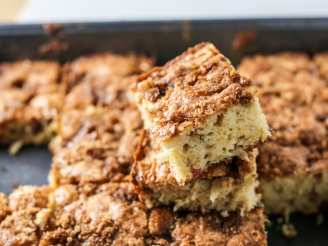
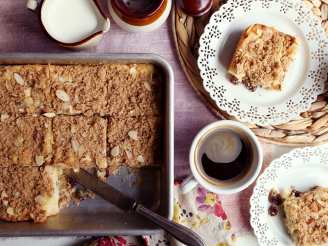
Coffee Cake

"A delicious morning snack."

- Ready In:
- 50mins
- Ingredients:
- 21
- Serves:
-
10
ingredients
- 1 cup fresh raspberries or 1 cup frozen unsweetened raspberries
- 1 cup fresh blueberries, picked over rinsed,and patted dry or 1 cup unsweetened frozen blueberries
- 5 tablespoons granulated sugar, plus
- 1⁄2 cup granulated sugar, divided
- 1⁄4 teaspoon cinnamon
- 2 large egg whites
- 1⁄4 cup canola oil or 1/4 cup safflower oil
- 1⁄4 cup unsweetened applesauce
- 1⁄4 cup apple juice or 1/4 cup orange juice
- 1 teaspoon almond extract or 1 teaspoon orange extract
- 1 cup unsifted cake flour
- 1 teaspoon baking powder
- 1⁄2 teaspoon salt
- 1⁄4 cup toasted wheat germ (optional)
-
Crumb Topping (Optional)
- 2 tablespoons unsifted cake flour
- 2 tablespoons granulated sugar
- 3 tablespoons Grape-nuts cereal or 2 tablespoons chopped walnuts
- 1⁄2 teaspoon cinnamon
- 2 teaspoons unsalted butter or 2 teaspoons margarine
- 1 teaspoon canola oil
- 1 teaspoon apple juice or 1 teaspoon orange juice, as needed
directions
- You can use whatever combination of berries are available.
- Position a rack in the center of the oven and preheat it to 350°F Coat a 10-inch pie plate (or an 8- or 9- inch square pan) with cooking spray.
- Combine the fruit, 5 tablespoons of the sugar, and the cinnamon in the oiled pie plate, and toss together lightly.
- Set aside.
- In a large bowl, whisk together the egg whites, the remaining 1/2 cup sugar, oil, applesauce, juice, and extract.
- Place a strainer over the bowl and add the flour, baking powder, and salt.
- Stir and sift the dry ingredients onto the applesauce mixture.
- Add the wheat germ if using it.
- Beat the dry ingredients into the wet just to blend; do not overbeat.
- To make the optional topping, combine the dry ingredients in a small bowl.
- Add the butter, and use your fingertips to pinch the ingredients together.
- Add the oil and juice and toss with a fork until crumbly, adding a few more drops of juice if needed.
- Pour the batter over the fruit in the pan; don't worry if some fruit peeks through.
- Sprinkle the crumb topping, if using, over the cake.
- Bake for 35 to 40 minutes if using fresh fruit, or 50 minutes for frozen fruit, or until the top of the cake is golden brown and springy to the touch and a cake tester inserted in the center of the cake comes out clean.
- Cool the cake slightly on a wire rack, then cut and serve warm.
- Cake is best fresh from the oven, but it keeps a day or two, covered, at room temperature.
- Warm before serving.
- Note: The applesauce in the cake adds moisture and flavor but weights the crumb slightly.
- If you prefer a lighter texture, omit the applesauce and use 1/3 cup canola oil instead of 1/4 cup.
Questions & Replies

Got a question?
Share it with the community!
Reviews
Have any thoughts about this recipe?
Share it with the community!
RECIPE SUBMITTED BY

Jellyqueen
Repton, 39
<p>Well, in trying to make a few corrections on my about me page, I managed to delete all the banners I have had in the past. So bear with me as I try to rebuild this mistake <img src=http://i424.photobucket.com/albums/pp330/LadyBlueNose/Contest%20Banners%20-%20Feb%202010/05-1-1-1-1.jpg border=0 alt= />.<img src=http://i424.photobucket.com/albums/pp330/LadyBlueNose/Contest%20Banners%20-%20Feb%202010/beans3Participant-1.jpg alt= width=300 height=200 /><a href=http://i424.photobucket.com/albums/pp330/LadyBlueNose/Contest%20Banners%20-%20Feb%202010/beans3Participant-1.jpg><img src=http://i250.photobucket.com/albums/gg271/MrsTeny/Permanent%20Collection/Sharon123CookathonParticipationSticker.jpg alt= width=406 height=111 /></a><a href=http://smg.photobucket.com/albums/v51/tiggrr34/?action=view?t=HolidayOrnamentSwapTag2c-1-1-1.jpg target=_blank><img src=http://img.photobucket.com/albums/v51/tiggrr34/HolidayOrnamentSwapTag2c-1-1-1.jpg border=0 alt=Photobucket /> <br /><img src=http://i16.photobucket.com/albums/b2/kiwidutch/my3chefs2009final-1.jpg alt= /> <br /><img src=http://i270.photobucket.com/albums/jj81/HokiesLady65/Recipezaar%20Album/iplaytagin.jpg alt= /><img src=http://i10.photobucket.com/albums/a132/tgifford/Game%20Room%20Banners/AM%20Banners/ZaarStar-AMBanner.jpg border=0 alt=Photobucket /> <br /><br /><img src=http://i80.photobucket.com/albums/j166/ZaarNicksMom/Animation6.gif alt= /><img src=http://i80.photobucket.com/albums/j166/ZaarNicksMom/PACsticker-Adopted.jpg alt= /> <br /><img src=http://www.satsleuth.com/cooking/Swap14.JPG alt= /> <br /><img src=http://i6.photobucket.com/albums/y227/vjuhl/MEPcookathon.jpg alt= /> <br /><img src=http://i2.photobucket.com/albums/y22/dcmac/dpg11.gif alt= /></a></p>
<p> </p>