Community Pick
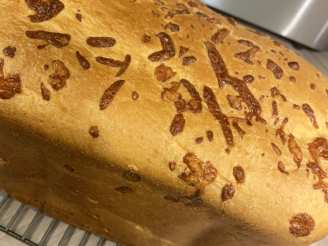
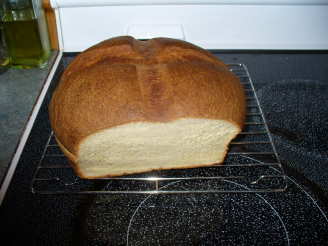
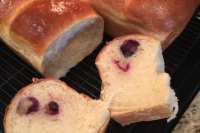
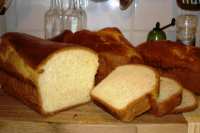
Brioche

"From Baking with Julia, my favorite baking book. DO NOT make substitutions, or shortcuts in this recipe. I can not and will not guarantee the results if you do. But if you elect to take on this, the Queen of Bread, you will be rewarded with an incredible bread that is great on it's own, makes great sticky buns, and makes really fabulous french toast and bread pudding."

photo by limeandspoontt


- Ready In:
- 1hr 15mins
- Ingredients:
- 9
- Yields:
-
3 loaves
ingredients
-
THE SPONGE
- 1⁄3 cup warm whole milk (100- 110 degrees F)
- 2 1⁄4 teaspoons active dry yeast
- 1 large egg
- 2 cups unbleached all-purpose flour
-
THE DOUGH
- 1⁄3 cup sugar
- 1 teaspoon kosher salt
- 4 large eggs, lightly beaten, room temp
- 1 1⁄2 cups unbleached all-purpose flour (approx)
- 6 ounces unsalted butter, room temperature
directions
- Put the milk, yeast, egg and 1 cup of the flour in the bowl of a heavy duty mixer.
- Mix the ingredients together with a rubber spatula, mixing just until everything is blended.
- Sprinkle over the remaining cup of flour to cover the sponge.
- Set the sponge aside to rest uncovered for 30-40 minutes.
- After this resting time, the flour coating will crack, your indication that everything is moving along properly.
- Add the sugar, salt, eggs, and 1 cup of the flour to the sponge.
- Set in the mixer, attach the dough hook, and mix on low speed for a minute or two, just until the ingredients look as if they are about to come together.
- Still mixing, sprinkle in 1/2 cup more flour.
- When the flour is incorporated, increase the mixer speed to medium and beat for about 15 minutes, stopping to scrape down the hook and bowl as needed.
- During this mixing period, the dough should come together, wrap itself around the hook and slap the sides of the bowl.
- In order to incorporate the butter into the dough, you must work the butter until it is the same consistency as the dough.
- You can bash the butter into submission with a rolling pin or give it kinder and gentler handling by using a dough scraper to smear it bit by bit across a smooth work surface.
- When it is ready, the butter will be smooth, soft, and still cool- not warm, oily or greasy.
- With the mixer on medium-low speed, add the butter a few tablespoons at a time.
- This is the point at which you'll think you've made a huge mistake, because the dough that you worked so hard to make smooth will fall apart- don't worry, don't panic- carry on.
- When all of the butter has been added, raise the mixer speed to medium-high for a minute, then reduce the speed to medium and beat the dough for about 5 minutes, or until you once again hear the dough slapping against the sides of the bowl.
- Clean the sides of the bowl frequently as you work; if it looks as though the dough is not coming together after 2-3 minutes, add up to 1 tablespoon more flour.
- When you're finished, the dough should feel somewhat cool.
- It will be soft and sill sticky and may cling slightly to the sides and bottom of the bowl.
- FIRST RISE: Transfer the dough to a very large buttered bowl, cover tightly with plastic wrap, and let it rise at room temperature until doubled in bulk, 2- 2 1/2 hours.
- SECOND RISE AND CHILL: Deflate the dough by placing your fingers under it, lifting a section of dough, and then letting it fall back into the bowl.
- Work your way around the circumference of the dough, lifting and releasing.
- Cover the bowl tightly with plastic wrap and refrigerate the dough overnight, or for at least 4-6 hours, during which time it will continue to rise and may double in size again.
- AFTER THIS LONG CHILL, THE DOUGH IS READY TO USE IN ANY BRIOCHE RECIPE.
- STORING: If you are not going to use or bake the dough after it's second rise, deflate it, wrap it airtight, and store it in the freezer.
- The dough can remain frozen for up to a month.
- Thaw the dough, still wrapped, in the refrigerator overnight and use it directly from the refrigerator.
- TO BAKE IN LOAVES: Divide the dough into thirds.
- Divide each section into 6 equal pieces, and shape each piece into a ball on a lightly floured work-surface.
- Place the balls side-by-side in a greased loaf pan so that you have 3 short rows, each with two balls of dough.
- Do the same with the other two pieces of brioche dough.
- Cover the pans with plastic and allow the dough to rise at room temperature for 2 hours, or until doubled in size.
- Preheat the oven to 375°F.
- Lightly brush each loaf with egg wash, taking care not to let the glaze dribble into the pan (it will impair the dough's rise in the oven).
- Use the ends of a pair of very sharp scissors to snip a cross in each ball of dough.
- Bake the loaves for about 30 minutes, or until an instant read thermometer reads 200°F.
- Cool to room temperature on a rack.
- NOTE: You could also use this dough to make the very finest sticky-buns you've ever eaten in your entire life, or you can press it out in a deep dish pizza pan, cover it with cream cheese mixed with powdered sugar, the put fruit slices or berries over it for a very upscale"fruit pizza".
Questions & Replies

-
 What size loaf pans are you using? I'm in Canada and have several different sized loaf pans.
 -
What size loaf pan?
-
 What size loaf pans?
Reviews
-
 Great brioche. This replaces the recipe that I've been using for years - Andre Soltner's - his has way more butter, almost too much. I made this before I had a new food processor, so since the whole thing was by hand, I halved the quantity so that it was managable. Getting the butter into the dough by hand is quite an experience. Step 16 is important for cooks new to brioche making. At one point it's inevitable that you think that this time it will never come together. But, it does. Thanks Petitfour. Beautiful bread and great directions.
 -
 Wow. I used this recipe as a tester for my new (used) kitchen-aid mixer. This also happened to be my first time making any sort of bread (with the exception of failed beignets a year or so ago and some Irish soda bread that doesn't require yeast). This was a very long process seeing as I started it in the morning with the intent on baking it tonight. I did manage to do it all in one day but it has taken quite awhile. The result however is an incredibly soft and delicious brioche that I am more than ecstatic about. Brioche is hard to find in stores around here and the few that have it charge roughly $6 for 1/2 of a loaf (and its nowhere near as good). Extremely happy with this recipe and will absolutely be making again...and again...and again....
 -
 This was first attempt at making bread in a loaf pan. For such a detailed 38 step recipe, there are some glaring problems. In the ingredients add 1 more egg for the egg wash.Step 29 and 30 are confusing. I thought I was making a loaf of bread - not biscuits! Dividing dough into thirds making three loafs, experiment! You do not have to make the biscuits. What size loaf pan are we to use? I used 2 - pyrex 8.5x4.5 and a metal one 9x5 or so. The bread didn't fill any of the pans when done. In the metal one, the loaf came out a lot easier than the pyrex. All three were well buttered. I used very little egg wash and made sure in was only on the top, not dribbling into the pan. And what shelf did you bake in the oven at? I started in what I thought was the middle. At least it was the middle setting. I had to lower the rack, at twenty minutes because the top was golden brown already.I also had a thermometer in the oven, and yes I was baking at 375. I went down to the second rack setting to the bottom, which put the loafs in the middle of the oven. This was on me, now I know better. The bread had great texture, but the crust was too dark and crunchy. When you start out by stating to follow exactly, then give us 38 steps, please give us a recipe without leaving out anything. The bread itself deserves more than two stars but the lengthy instructions missing steps AND the missing egg deserves less than one star. I feel this was a waste of a day in the kitchen.
 -
This is a GREAT recipe!!!!I followed exactly the process, then divided into balls and froze them i thaw in refridgerator over night then put in a very small bread pan, and bake. Yummy Bread !!!
-
 I am not a baker by any standards, 'cept when it comes to bread puddin' - I can throw down! But this recipe is ah-mazingggg!!! I mimicked every step in the recipe, minus putting it in a pan and baking it. My husband and son loved to go to Mimi's Cafe on the weekends for their "Cinnamon Brioche French Toast" so I decided to finally put this recipe to use, to create a home-made version. I posted the picture up (hopefully, it gets approved): one loaf, I braided it like challah bread and the other, I mocked a cinnamon roll, then braided it. For the cinnamon roll version, I flattened the dough, poured melted butter and slabbed on a generous mixture of cinnamon and brown sugar. Then I rolled it like a cinnamon roll to make it into one large loaf. I then took scissors and made three even cuts, be sure not to cut it all the way, leave the top part to 'tuck' under. I braided it, gently placed it in a loaf pan, brushed egg wash and baked it as prescribed. My boys LOVED it!
see 53 more reviews
Tweaks
-
 Absolutely fantastic brioche. Wow. Another one of those I-can't-believe-I-made-this experiences. I know the recipe note says no substitutions/shortcuts, but I did it anyway (in my line of work, they call that "oppositional behavior"). Substitutions: I used nonfat milk, 8 T light butter (Land O' Lakes) and 5 T unsalted butter, and Splenda for all but 1 T of the sugar. Shortcut: I had my bread machine prepare the dough, and ran it through two kneading cycles. At the stage when it was time to add in the butter, I opened the lid and used a spatula to help the machine incorporate it all. I formed just two loaves (sandwich-sized), shaped as instructed, and baked them in my oven. This brioche will be perfect for the Monte Cristo sandwich I'll be having for lunch today, and I'll surely prepare this dough again to make the fruit pizza and the cinnamon rolls, uses suggested by P4. Again, wow. Thanks for posting!
 -
 I also love the "Baking with Julia" cookbook, as well as this recipe. I use little individual-sized, fluted brioche molds and recommend the pans that are NOT nonstick for the best and most authentic "crusting." I also recommend substituting regular, granulated salt for the kosher salt (and using a bit less than the full teaspoon to compensate for the different shape of the salt crystals). Regular salt generally makes for more consistent results with baking, while kosher salt is better for seasoning anything else.
RECIPE SUBMITTED BY

P48422
United States