Community Pick
Classic Pie Crust, Idiot Proof Step-By-Step Photo Tutorial

"This pie crust retains the flavor of an all butter crust, but is flakier because of the shortening. The lemon juice isn't in the recipe for lemon flavour... trust me you won't taste it, but rather to work with the flour and prevent the pastry from being tough. I also find that the dough gives a bigger yield than the original 9 inch size stated, I roll mine relatively thin and can get a full top and bottom for a 26 cm (12 inch) shallow pie dish. I have included 20+ step by step photographs to help you see *exactly* how this is made so that you now have instructions for making an entire pie crust from ingredients to table. The new instructions may look long, but I have only tried to give practical details to that even if this is your first ever pie crust, you will have ALL the information you need for success. Enjoy! ZWT REGION: United States."
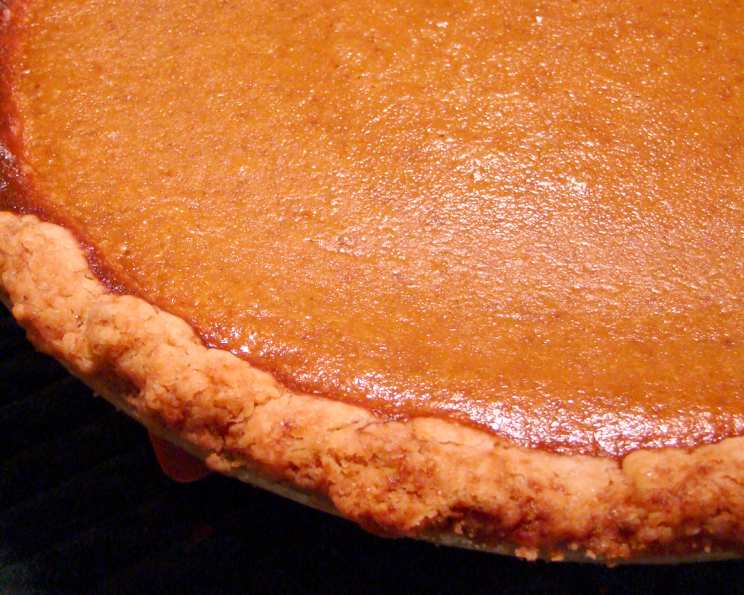
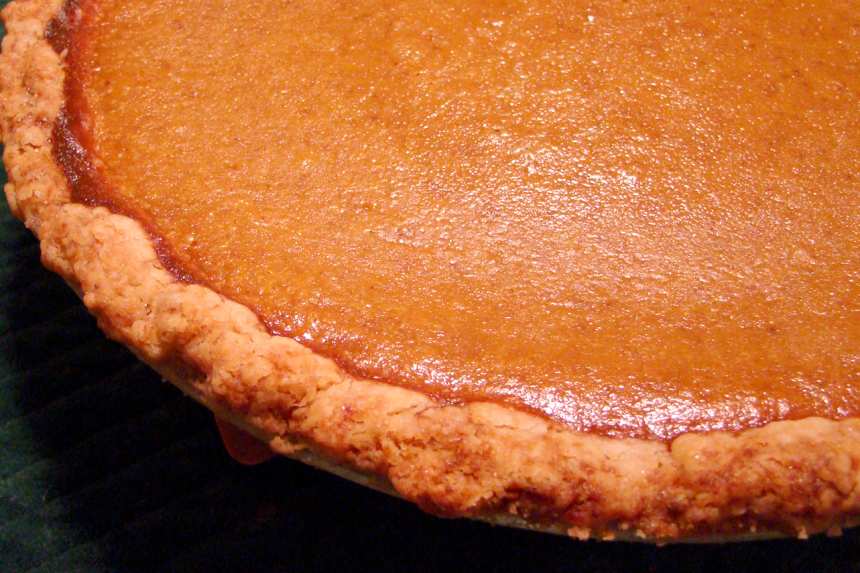
photo by PKG178


- Ready In:
- 55mins
- Ingredients:
- 7
- Yields:
-
1 nine inch pie
ingredients
- 11 1⁄4 ounces all-purpose flour (320g)
- 1 tablespoon sugar
- 1⁄2 teaspoon salt
- 1⁄4 lb cold unsalted butter, cut in 1/2 inch pieces (115g)
- 1⁄4 cup cold vegetable shortening, cut in 1/2 inch pieces
- 2 teaspoons fresh lemon juice
- 3 ounces cold water
directions
- Preheat oven to 220°C (425°F).
- Put the flour, sugar, and salt in a food processor; pulse briefly to combine.
- Add the butter and shortening; pulse just until coarse crumbs form, about 30 seconds.
- Add the lemon juice and water.
- Pulse just until moist crumbs form.
- Turn the dough onto a work surface and gently shape it into two equal disks about 4 or 5 inches (10-12 cm) in diameter.
- Wrap in plastic and refrigerate at least 1 hour or up to 1 day (can freeze).
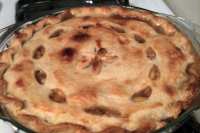
- Elaborating on the original recipe I adopted -- Take one of the two disks and roll it out.
- Place into a lightly greased (I use cooking spray) pie dish, I also carefully roll the pastry around the rolling pin and then "unroll" it into the dish, it's less likely to break this way.
- I take an egg and separate the yolk from the white -- and using a pastry brush, I "paint"the pastry base with some of the egg yolk. Don't use it all because you will need some of it to paint the lid of the pie too.
- This will make a seal and help prevent the bottom of the pie from becoming soggy when the wet filling is added. (Please note: in the photo series one of the small dishes contains the egg white -- it's not used in this recipe as we only need the yoke) Then add your pie filling -- mine in the photo demo is meat, yours could be vegetable or fruit etc --.
- Now roll out your second disk of dough and carefully place this on top of your pie.(I dampen the top edge of the base with a very small amount of water to help join the two layers before laying on my pastry "lid") and then I use a fork to push the edges together.
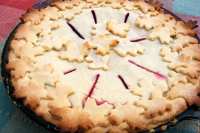
- After trimming the excess pastry from around the edges, I gather up the pastry scraps and roll them out -- cutting some "leaves" to decorate the top.I wet the bottom of these decorations with a tiny amount of water and then place them on top of the pie.
- Then I add a tablespoon of water to the last of the egg yolk and gently "paint" the whole top of the pie. Lastly, use the fork to poke some holes around the pastry to let the steam out. Put into the oven and bake according to the instructions for the recipe you are making.
- In the demonstration photo series I made Australian Meat Pie(recipe #21726) and there is a precooked filling, so *that* recipe called for the first 15 minutes on 220°C (425°F) and then 180°C (350°F) for 25 minutes or until golden brown -- DO be aware that different fillings require different cooking times and temperatures and adjust accordingly. Et Voila ! and so EASY !
Questions & Replies

Got a question?
Share it with the community!
Reviews
-
 This is indeed a classic pie crust! Very flaky and it has a great buttery taste. Easy to follow recipe. I made 2 crusts and froze one since I was making a cream pie. I will use this recipe again! Thanks for posting.
 -
 For those of you making this recipe without a scale i did some research due to the fact that on two of the posts there is a debate regarding converting from ounces to cups.. This is the website i used http://www.gourmetsleuth.com/cooking . For the record. 11 1/4 ounces of white unbleached all purpose flour = 2.55 cups.
 -
 Excellent! Everything about this recipe works very well- the preparation was a breeze, the measurements accurate, and the taste and texture was great. The dough was very easy to work with and cooked up very flaky. Thanks!
 -
 This had to be the flakiest pie crust I've ever made. Easy to prepare in the food processor with perfect results. I loved the lemon in crust! Thanks for sharing this recipe!
 -
I'm new to the world of pastry, but this recipe was an easy to follow introduction to it. The crust was beautiful and flaky, and sooo easy! Thank you!
see 116 more reviews
Tweaks
-
 Great pie crust. I did use lard in place of the shortening but was so good. Used one on Delicious chicken pot pie. Still one left to use.
 -
A very simple and excellent pie crust. When combining the shortening and the butter, I used very short bursts of pulsing and left in a few large chunks of fat (the size of almonds). After adding the lemon juice, I added the water a little at a time and stopped when I could grab a piece of dough in my hand and make a fist around it and it held a tight shape (left indentation marks from the fingers). I ended up with leftover water but I didn't worry too much about it! The crust came out GREAT!!! The people I served it to devoured it (I made Libby's pumpkin pie). Instead of brushing the trim of the pie with egg wash I just sprinkled a little granulated sugar instead. Thanks so much for sharing!
-
 From the bottom of my heart, I thank this recipe. When my husband requested peach pie for this birthday this year, I felt an intense dread creeping in on me. You see, I have always had great difficulty in rolling crusts for anything in the past. Anything that could go wrong, did. But not this time. This is my pie crust from now on, and I'll be glad to make it anytime! The steps are perfect and clear. I did substitute about 2 ounces of cornmeal for 2 ounces of flour, as per a suggestion from Alton Brown (DH's culinary idol) and I needed a touch more water (it was a dry day outside) but otherwise this was perfect as written. It even survived my running out of butter and having to throw a combination of flour, cornmeal, sugar, salt and shortening in the fridge for a few hours until I could get more. If you've ever had trouble with crusts, give this a try--if it worked for me, I can promise it will work for you!!! And of course, I will be making it again, as half the pie has mysteriously disappeared into the birthday boy since yesterday!
 -
Assembled everything next to food processor and it went so quickly! Not having lemon juice I used vinegar instead. Refrigerated 1 hour. Delightful to work with and bakes up flaky and delicious.
RECIPE SUBMITTED BY

kiwidutch
Netherlands